


MiniMax H3 has been very popular lately. After seeing the sample images, many people are ready to buy an “AI video training camp” course. My advice: don’t spend that money just yet. Using MiniMax H3 for image-to-video generation is actually not difficult. There are mainly three steps:
Download ComfyUI (the tool that runs the model).
Have the software automatically download the MiniMax H3 model.
Then you can generate videos from images.
The methods for using other image-generation and video-generation models are basically the same as those in this tutorial. Once you understand one, you can generally understand them all. Step 1: Download and install ComfyUI. Official download address: https://comfy.org/download Download and install the desktop version. It is about as difficult as downloading the desktop version of WeChat.
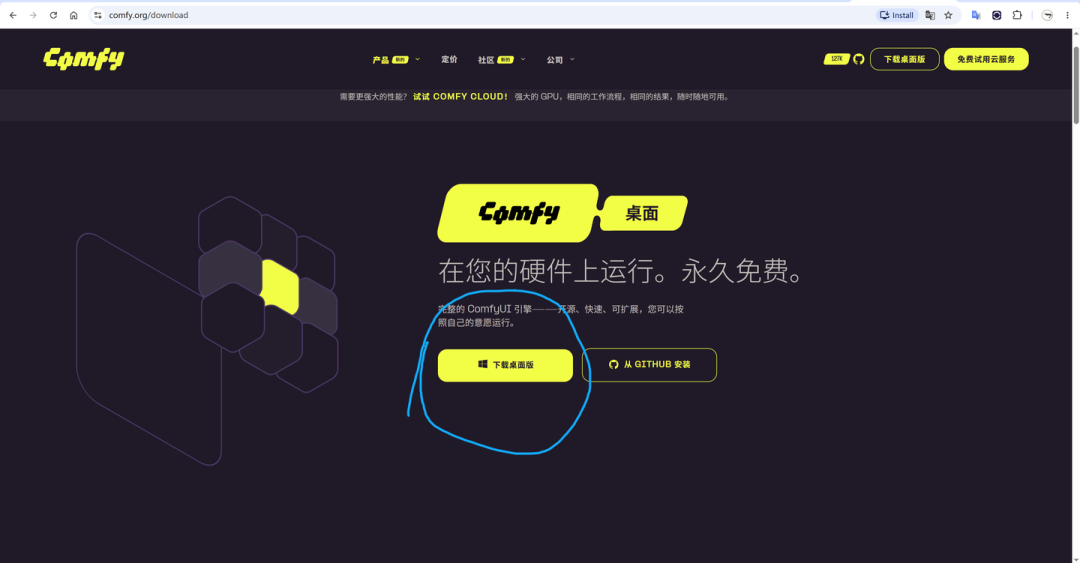
>After installing ComfyUI Desktop, the first launch will automatically prepare the runtime environment. Just wait patiently for it to finish. If you are prompted to update, be sure to do so. Step 2: Download the MiniMax H3 model. In ComfyUI, select “Templates” from the vertical toolbar on the left, then find the “Video” generation category. Currently, the first option is MiniMax H3 Image-to-Video.
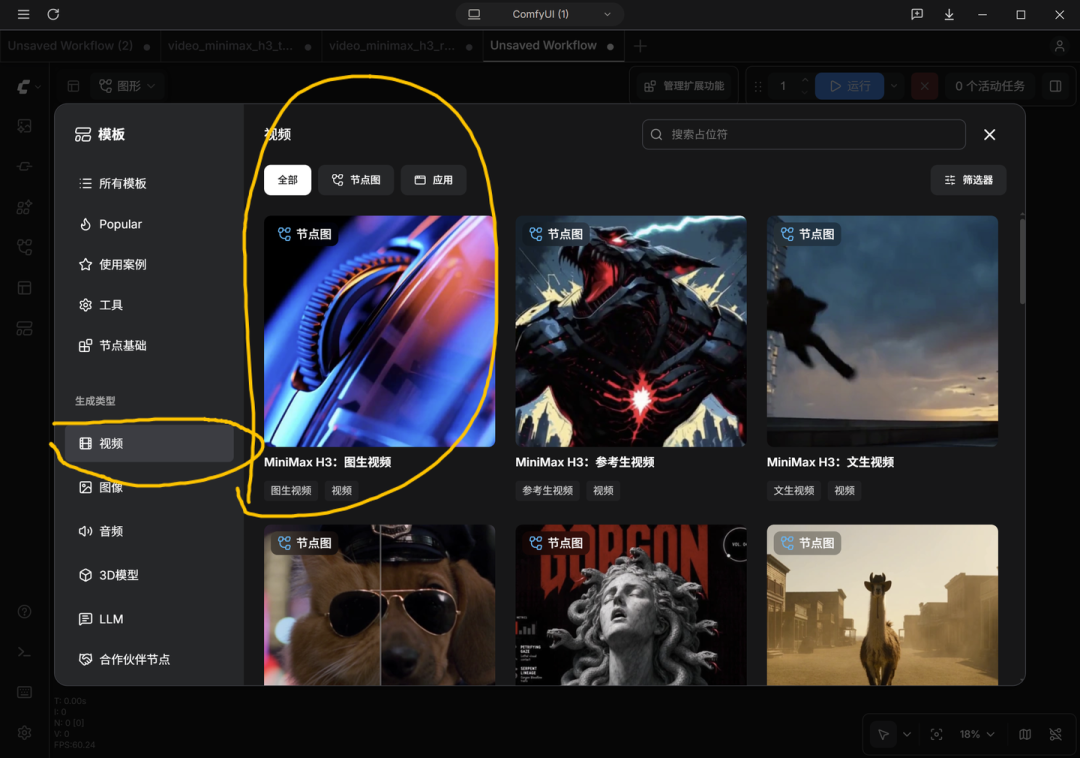
>As soon as you click MiniMax H3: Image-to-Video, a pop-up will appear saying that several errors have been found. Don’t panic! This is simply because you have not downloaded the open-source MiniMax H3 model yet.

>Click “View Details,” then click “Download All.” That’s it. Wait for the models to finish downloading, and you’re done.
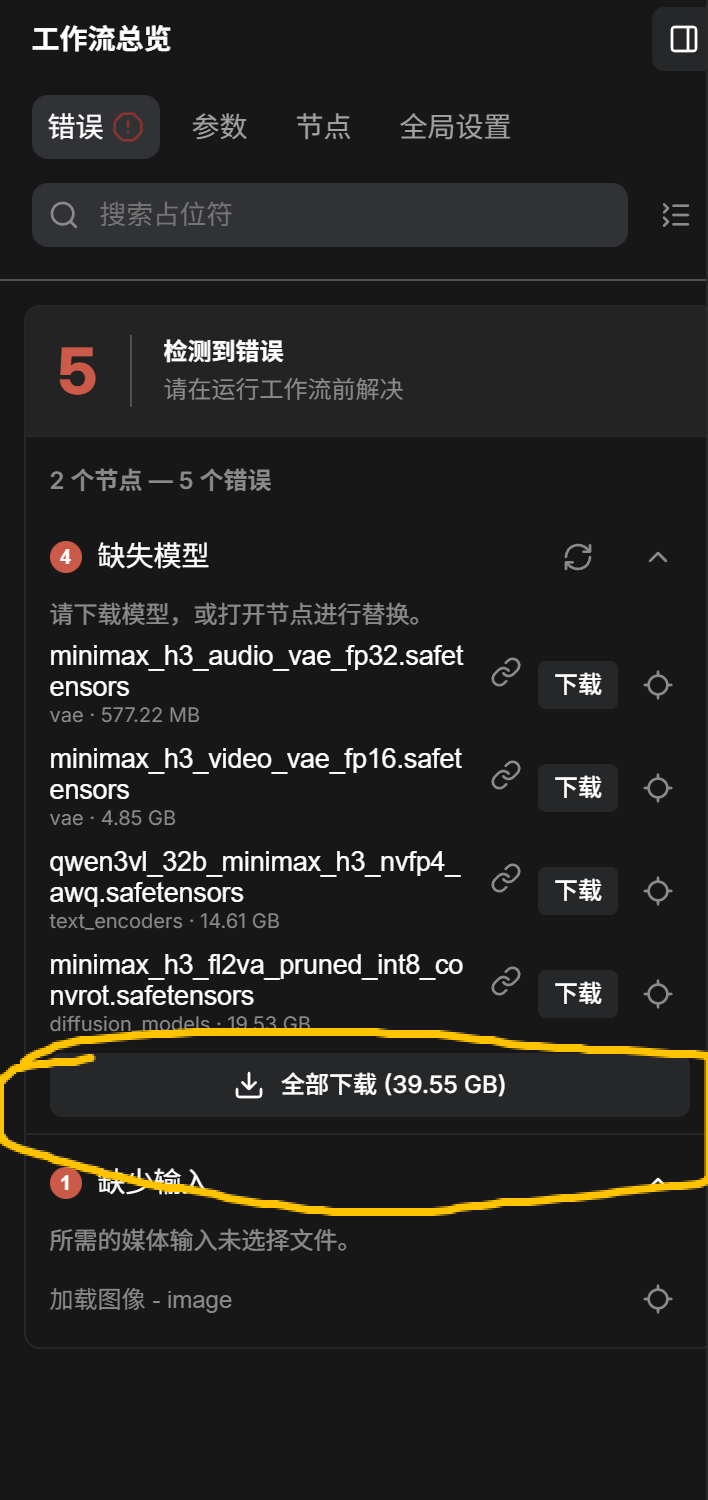
>Now, about the error: why are four models missing? It feels like MiniMax H3 is just one model. The reason is that a complete image-to-video workflow generally requires the following types of files:
Diffusion model: Actually responsible for generating the video frames (the core model).
Text encoder: Responsible for understanding your prompts (an auxiliary component that can be replaced, such as with an uncensored version).
VAE: Responsible for restoring the data inside the model into video frames (a necessary tool).
Image-to-video workflow JSON: Connects the modules above in the correct way.
Therefore, you must download all the missing models before the workflow can run. Step 3: Start generating videos from images. Once the models are downloaded, you will see several boxes and connecting lines. It may look intimidating, but there are really only three steps: 1. Upload an image. 2. Describe how it should move. 3. Click “Run.”
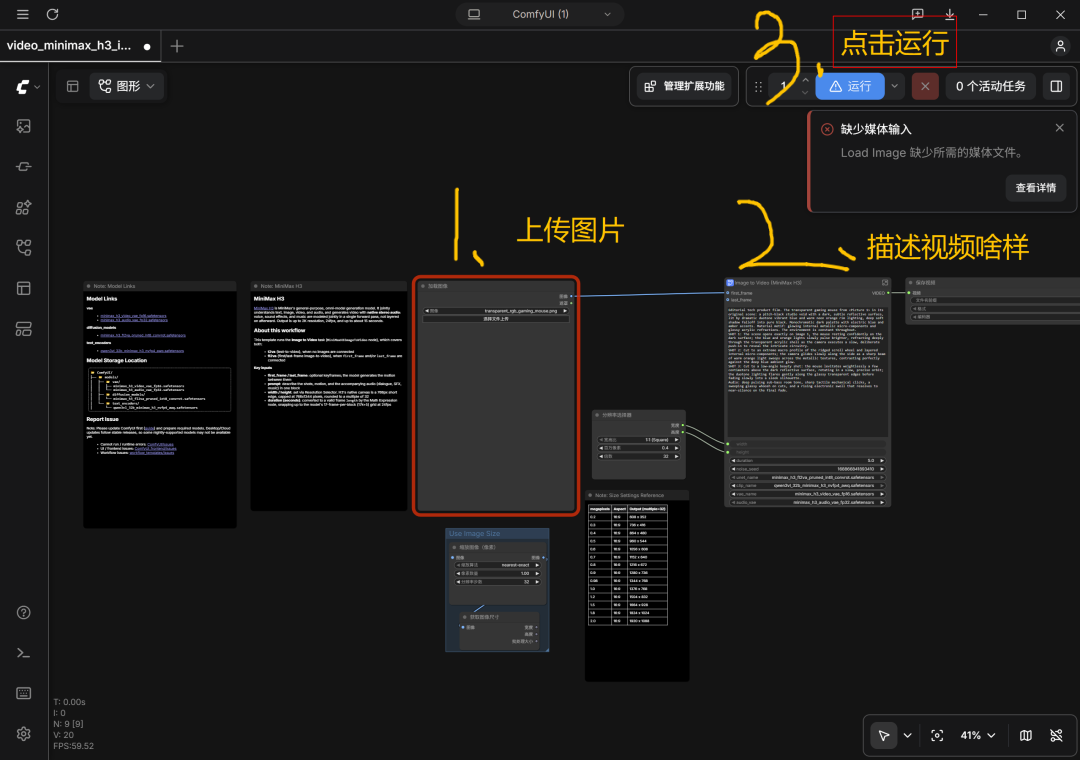
>The two boxes on the far left contain model information and related links. They are not very useful and are mainly there to look intimidating. Personal example:
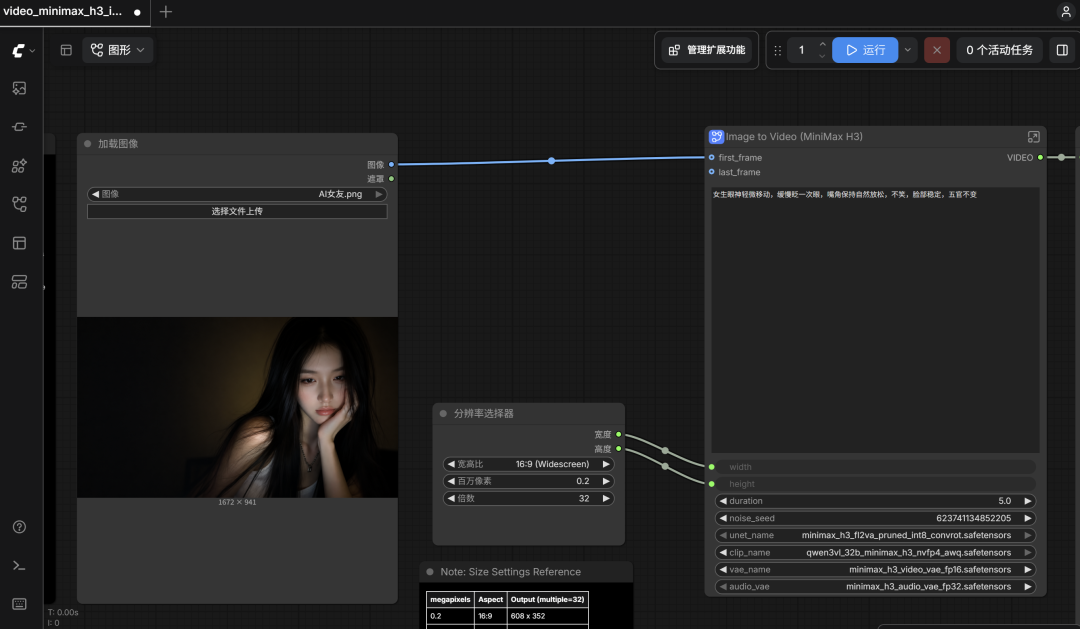
>Finally:
This is the simplest official workflow, mainly intended for complete beginners to run through the process.
Workflows can also be much more complex, and models come in different quantized versions, with different files to download. For example, there are also uncensored versions that can generate unrestricted videos.
Video-generation models consume a great deal of GPU memory and system RAM. My test computer, with a 16G graphics card and 32G of RAM, was basically running at full capacity.
To produce satisfying, high-quality videos, you still need to learn something about “camera language”—in other words, how to clearly tell the model what scene you have in mind.
MiniMax H3 can output videos up to 15 seconds long in native 2K with stereo sound. To save time while writing this tutorial, I deliberately generated the videos at a lower resolution. I’m clarifying this to avoid misleading anyone into thinking that MiniMax H3 is not capable.