

What ontology-driven-dev Does
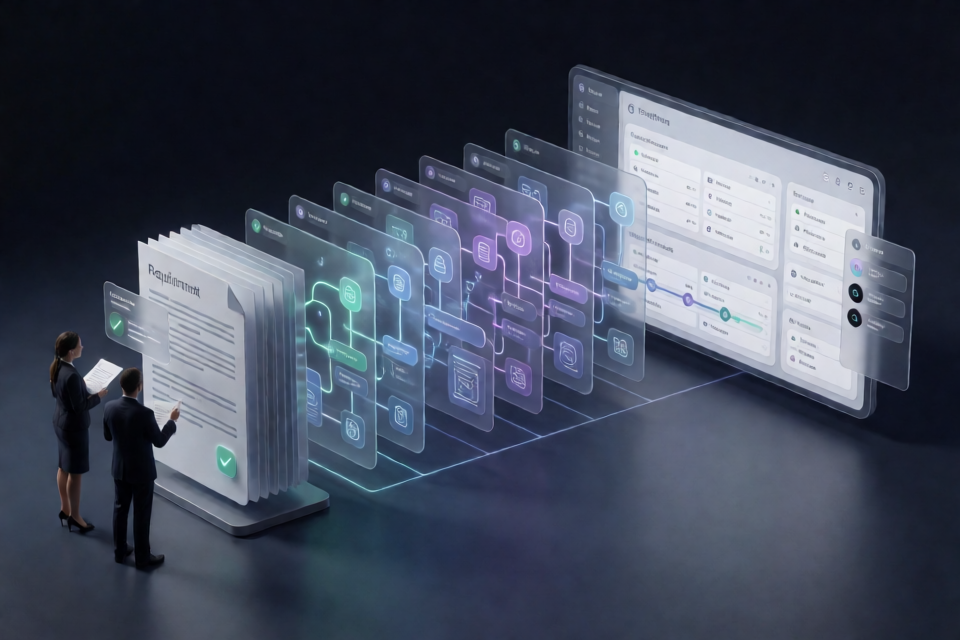
ontology-driven-dev is a reusable AI-agent skill for converting a sentence or paragraph describing a business requirement into a runnable browser-based management system. It follows a strictly ordered pipeline:
- Requirement Exploration
- Ontology Modeling
- Application Construction
The process is designed to keep requirements, ontology models, database structures, APIs, permissions, workflows, reports, user interfaces, and generated code aligned. Instead of allowing the implementation to drift away from the specification, the seven-model YAML set acts as the system's single source of truth.
The generated application is based on the bundled code-paas technology base. It uses Flask and SQLite for the back end and React, TypeScript, and Vite for the front end.
Key Features
- Traceable requirements: Each implemented feature maps back to an item in the requirement specification.
- Seven-model ontology: The project models objects, behaviors, rules, actors, flows, queries and reports, and UI definitions.
- Mandatory human confirmation: Each of the eight requirement-exploration stages stops until the user explicitly approves the result.
- Reusable technology base: The included Flask, SQLite, React, and TypeScript application can be copied and extended.
- Built-in platform capabilities: The technology base includes administration, a flow engine, a workbench, and an ontology registry.
- Mandatory AI chat panel: Generated applications include a right-side AI assistant with ontology-registry injection, tool calls, SSE streaming, and a read-only SQL safety boundary.
- Broad agent compatibility: The skill can be used with WorkBuddy, Claude Code, Codex, Cursor, Aider, Cline, and agents that support project instructions or system context.
Understand the Repository
The main file is SKILL.md, which contains the methodology, pipeline, and operating discipline that the AI agent must follow. The references/ directory provides the mandatory specifications for requirement exploration, ontology modeling, implementation mapping, AI-native architecture, and interface design.
The reference-example/ directory contains a completed sales-contract execution example, including a requirement specification, seven-model YAML files, and a manifest. Use it as a structural reference rather than as a substitute for modeling your own domain.
The techbase/ directory contains the clean code-paas source. During construction, it is copied into the target project's code-app/ directory and extended with the domain-specific models and features.
Prerequisites
Before starting, install the following tools:
- Python 3.10 or newer
- Node.js 18 or newer
- An AI coding agent capable of loading
SKILL.md - Network access during the first run for
pip installandnpm install
Install the Skill
WorkBuddy
Install the skill globally for all projects or locally for one project.
# User-level installation
cp -r ontology-driven-dev ~/.workbuddy/skills/ontology-driven-dev

# Project-level installation
cp -r ontology-driven-dev <your-project>/.workbuddy/skills/ontology-driven-dev
After copying it, start a WorkBuddy chat and use one of the trigger phrases described later in this tutorial.
Claude Code
Claude Code uses a compatible skill format and automatically discovers SKILL.md inside its skills directories.
# User-level installation
cp -r ontology-driven-dev ~/.claude/skills/ontology-driven-dev

# Project-level installation
cp -r ontology-driven-dev .claude/skills/ontology-driven-dev
Codex
Codex does not use a native skill registry, so place the skill inside the repository and reference it from the project's instruction file.
mkdir -p .codex/skills
cp -r ontology-driven-dev .codex/skills/
Add an instruction like the following to codex.md or AGENTS.md:
When the user requests ontology-driven development, requirement exploration, ontology modeling, seven-model modeling, code-paas, or an AI-native application, load
.codex/skills/ontology-driven-dev/SKILL.mdand strictly follow its three-stage pipeline and human-confirmation gates.
Ensure that the Codex sandbox has network access when dependencies must be downloaded.
Cursor, Aider, Cline, and Other Agents
For Cursor, place the skill instructions in project rules or .cursorrules. For Aider or Cline, paste the contents of SKILL.md at the beginning of a session or instruct the agent to load the file. Other agents can use it through their system-instruction or project-memory mechanism.
Run the Three-Stage Workflow
Stage 1: Explore and Confirm Requirements
Begin with a concise business request, such as:
Help me build a supplier contract management system with contract approval, execution tracking, payment milestones, role-based access, and management reports.
The skill uses the requirement-exploration specification in references/AI需求探索与确认提示词V9.0.md. It works through eight stages:
- Overall requirement understanding
- Business objects
- Functions and business rules
- Relationships across objects
- End-to-end collaboration and approval flows
- Queries and reports
- Roles and permissions
- Optional UI prototype
At the end of every stage, the agent must present a question, an AI recommendation, the reason for that recommendation, alternative choices, and a quick-reply option. It must then pause for explicit approval.
Do not ask the agent to bypass these checkpoints. The confirmation gates are essential because enterprise-specific assumptions must be reviewed before they become part of the model.
The result is a requirement document named in the form <domain>-需求规格说明书-V9.md. Its Appendix C provides the baseline input for ontology modeling.
Stage 2: Generate the Seven-Model Ontology
After the requirement specification is approved, ask the agent to continue with ontology modeling. You can also begin from an existing compatible specification with a prompt such as:
Based on this specification, perform the ontology modeling and generate the complete seven-model YAML set.
The skill uses references/ontology_modeling_framework_v9.md and treats Appendix C as a deterministic baseline. Stage 2 produces these model categories:
- M1: Object model
- M2: Behavior model
- M3: Rule model
- M5: Actor model
- M6: Flow model
- M7: Query and report model
- MU: UI model
The YAML files and manifest.json are written to the project's yaml/ directory. Before construction begins, the consistency gate checks traceability, one-to-one M7-to-M2 relationships where required, and acyclic M6 references.
Stage 3: Construct the Application
Copy the bundled technology base into the target project's code-app/ directory, then install the front-end and back-end dependencies.
cp -r <skill-root>/techbase/. <your-project>/code-app/

cd <your-project>/code-app/frontend
npm install

cd <your-project>/code-app/backend
pip install -r requirements.txt
The implementation guide defines a ten-step construction order:
- Write or place the seven-model YAML files.
- Generate database DDL and tables.
- Register the data dictionary.
- Implement behavior and rule services.
- Seed roles and permissions.
- Configure the flow engine.
- Create menus, pages, and routes.
- Add the mandatory right-side AI chat panel.
- Perform end-to-end integration.
- Complete acceptance checks.
If the ontology YAML already exists, you can request only this stage:
Generate the runnable system from these seven-model YAML files using the bundled code-paas technology base.
Run the Generated System
Start the Back End
cd code-app/backend
pip install -r requirements.txt
python app.py
The Flask back end runs at http://localhost:5000.
Start the Front End
cd code-app/frontend
npm install
npm run dev
The Vite development server runs at http://localhost:5173. Open this address in a browser and sign in with the default account:
Username: admin
Password: admin123
Consult techbase/README.md for technology-base-specific run instructions.
Useful Trigger Phrases
The agent can infer the appropriate workflow from several kinds of requests:
- Full workflow: Help me build an inventory management system.
- Ontology-driven conversion: Make this requirement ontology-driven.
- Modeling only: Based on this specification, do the ontology modeling.
- Construction only: Generate the system from these seven-model YAMLs.
- Keywords: ontology-driven, requirement exploration, ontology modeling, seven-model, code-paas, AI-native app, or business system development.
Advanced Tips
Preserve the Stage Order
Do not jump directly from a vague idea to implementation when using the full workflow. Stage 1 defines the accepted business scope, Stage 2 converts that scope into a formal model, and Stage 3 implements the model. Skipping a stage weakens the traceability guarantees that the project is designed to provide.
Treat Appendix C as a Modeling Contract
Stage 2 uses Appendix C from the approved requirement specification as its baseline. Avoid asking the agent to perform another large-scale decomposition during modeling. If important business details are missing, return to requirement exploration, update the specification, and obtain confirmation before regenerating the models.
Validate Cross-Model References Before Coding
Resolve consistency errors at the YAML level before generating services or pages. Pay particular attention to requirement traceability, M7 and M2 mappings, and cyclic references in M6 flows. Fixing these relationships early helps prevent contradictory database, API, report, and workflow behavior.
Keep the Models and Code Synchronized
When a business rule, permission, flow, report, or interface requirement changes, update the approved requirement and the relevant ontology models before changing implementation code. The intended discipline is requirement to ontology to code, not independent manual edits at each layer.
Retain the AI Safety Boundary
The right-side AI chat panel is a mandatory part of the generated application. Its architecture includes ontology-registry context, tool calls, SSE streaming, and read-only SQL access. Do not weaken the read-only SQL boundary when extending the assistant.
Use the Reference Example as a Quality Baseline
The completed sales-contract execution example demonstrates the expected relationship among the requirement document, seven YAML models, and manifest. Compare file structure and model completeness against this example while keeping your own domain definitions specific to the approved requirements.
Replace Default Credentials
The bundled account admin / admin123 is convenient for local startup. Replace it before using the generated system outside a controlled development environment.
Conclusion
ontology-driven-dev provides a disciplined route from an initial business request to a runnable Flask and React management system. Its strongest benefits come from the mandatory confirmation gates, the seven-model YAML source of truth, and the ordered mapping from requirements to models and implementation. By preserving that workflow, teams can build systems whose features, rules, permissions, flows, reports, interfaces, and code remain traceable and consistent.
The project and its bundled code-paas technology base are released under the MIT License and may be used, modified, and redistributed under those terms.