

3D Animation Without Coding? A Complete Remotion Skill + Three.js Guide
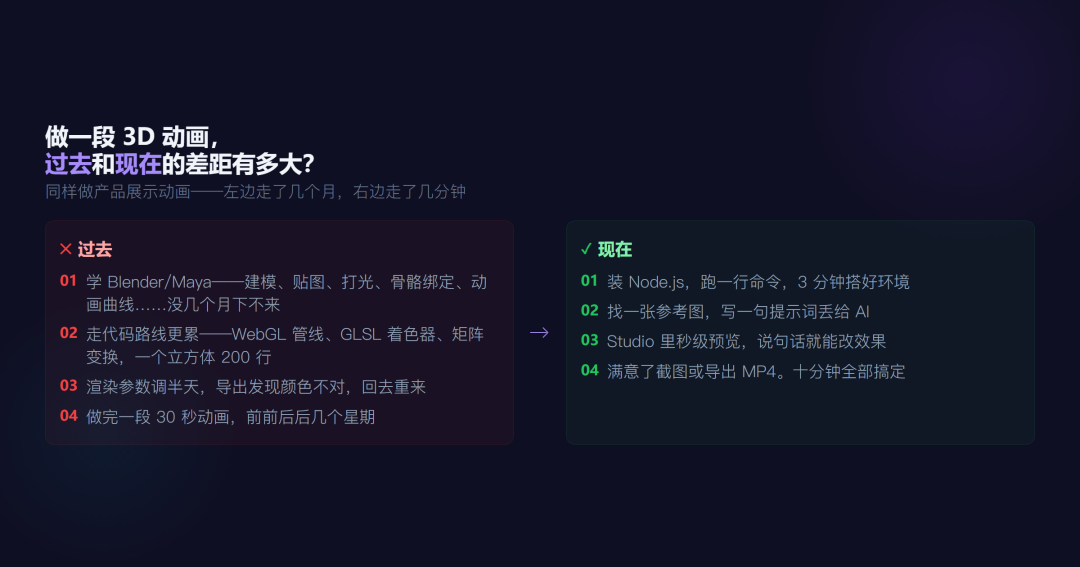
What did it used to take to make a 3D animation?
You first had to learn Blender or Maya—modeling, texturing, lighting, rigging, adjusting animation curves, and configuring render settings. It would take months to get anywhere. The coding route was even more intense: WebGL pipelines, GLSL shaders, matrix transformations, and dozens of Three.js APIs—even creating a rotating cube could take 200 lines of code.
What about now?
Install the tools, write a prompt, and AI helps generate a 3D scene. Preview it in Studio in real time, adjust it until you are happy, then take a screenshot, export it, and share it with your friends.
This article walks you through the entire process—without writing a single line of code.
1. Three Things Behind This “Magic”
Remotion Skill: You Describe It, It Writes the Code
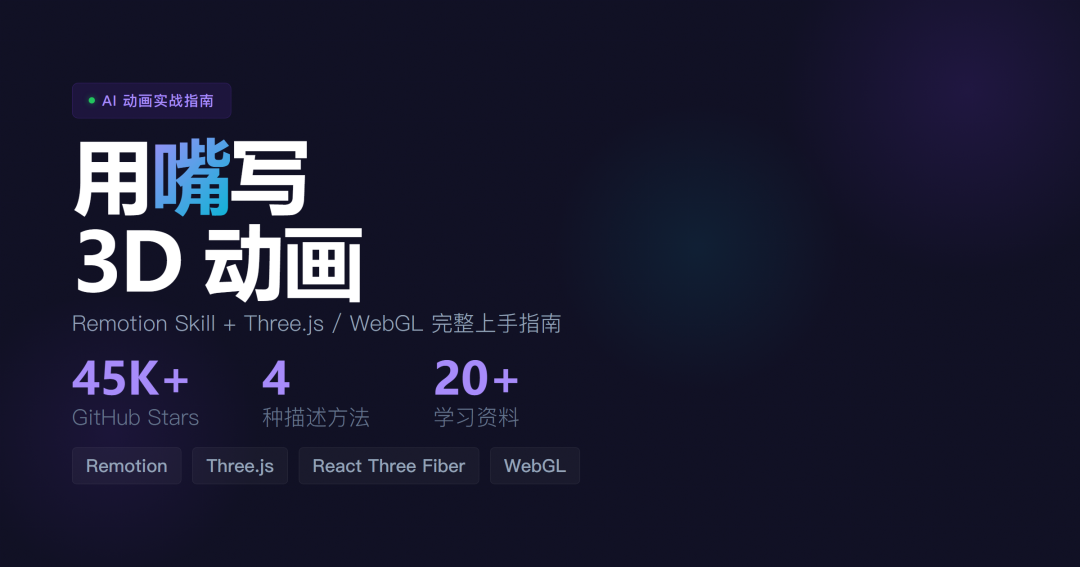
Remotion itself is an open-source framework for creating videos with React (45K+ GitHub stars). But for you, the truly important part is its Agent Skill—an AI plugin released in January 2026 that was installed 25K+ times in its first week.
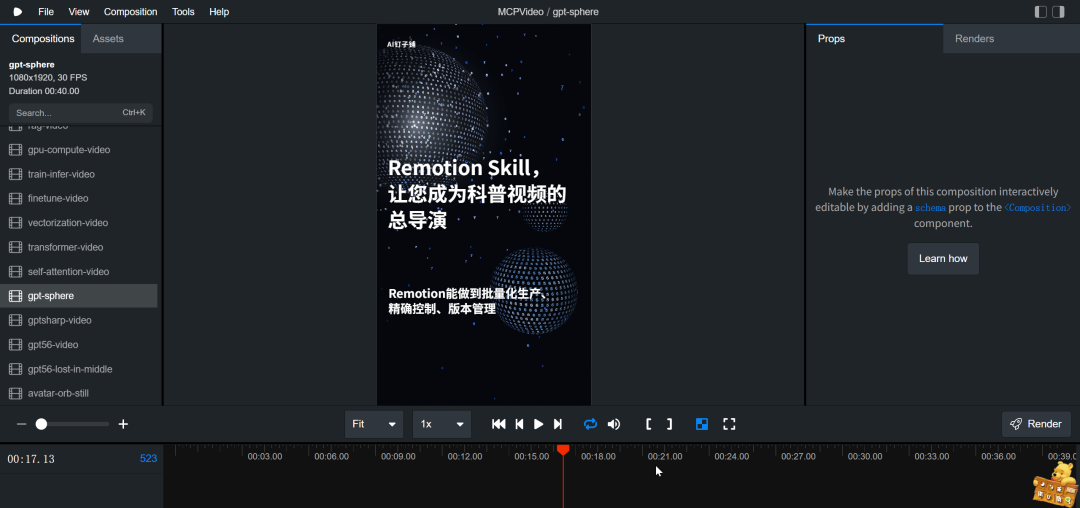
Once installed, you can describe the animation you want in natural language inside Claude Code, and AI writes the code automatically. A real-time preview window sits alongside it, so you can see the result and revise it whenever you are not satisfied.
Three.js / WebGL: A 3D Engine in the Browser
Three.js wraps up the complexity of WebGL. You do not need to know what vertex buffers or shader compilation are—you only need to say, “I want a metallic ball rotating under a spotlight,” and Three.js will render it on screen.
@remotion/three: Putting 3D Into Video
The Remotion team created a dedicated bridge package. It lets Three.js 3D scenes sync with Remotion’s video timeline—whatever is rendered in each frame is exactly what gets exported to MP4.
Put these three things together, and you get this: tell AI one sentence, and it generates a 3D animated video for you.
2. What Do You Need? Five Minutes Is Enough
The setup is very simple:
1. Install Node.js
Download it from nodejs.org and keep clicking “Next.” This is the basic environment Remotion runs in.
2. Create a Remotion Project
Open a terminal (on Windows, this is called Command Prompt or PowerShell) and enter:
npx create-video@latestIt will ask what to name your project. Choose a default template. Done in a minute.
3. Install Remotion Skill and 3D Support
npx skills add remotion-dev/skills npm i three @react-three/fiber @remotion/three @types/threeTwo commands—copy, paste, and press Enter. After that, whenever you say anything related to Remotion in Claude Code, AI will automatically activate “3D animation assistant” mode.
4. Launch the Preview
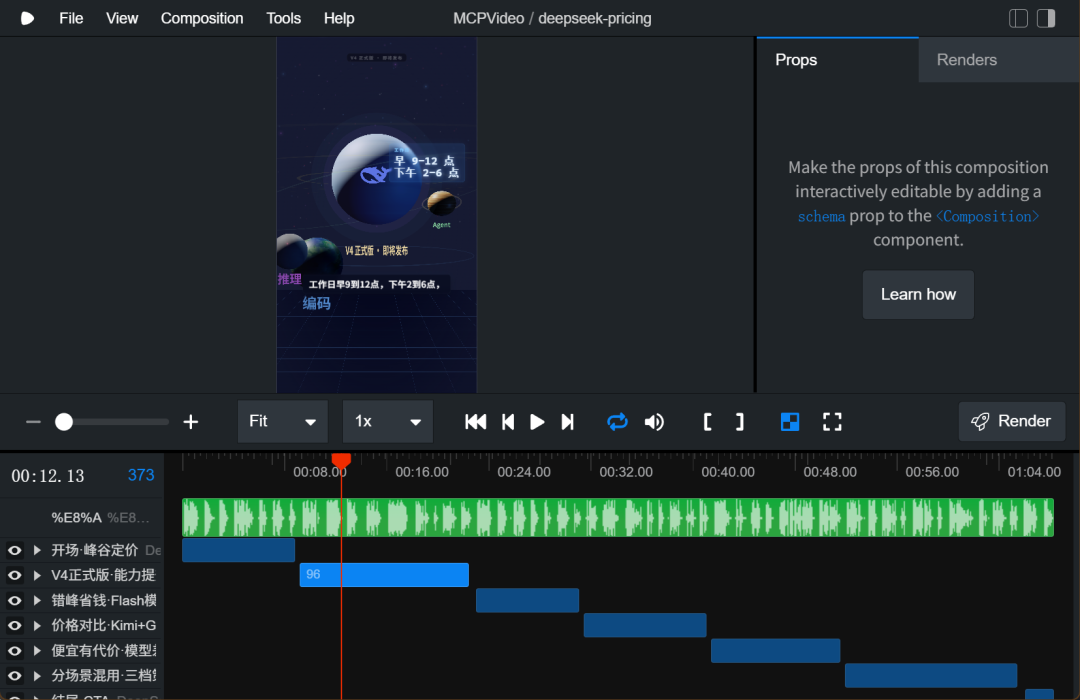
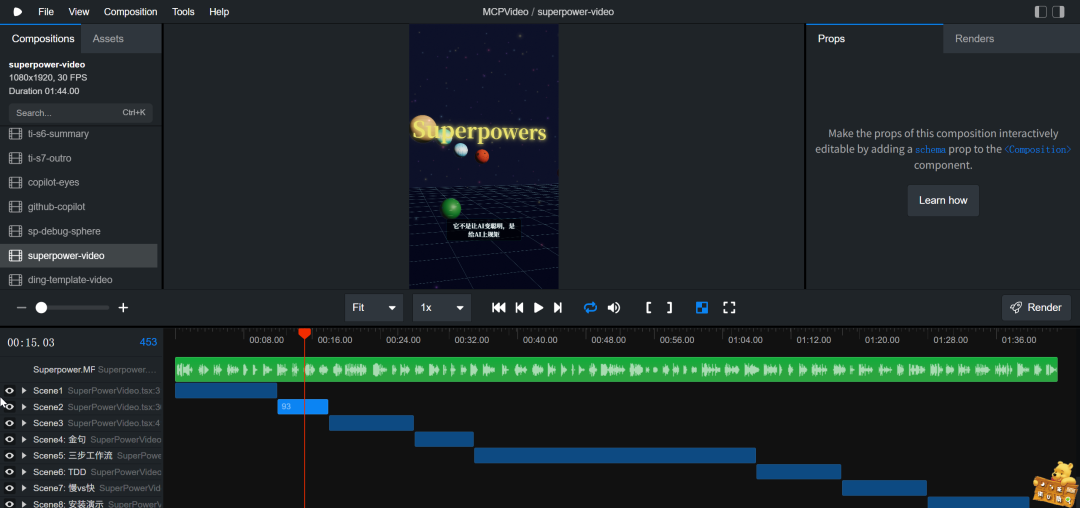
npx remotion studioA browser window will open automatically. From then on, every 3D scene you generate will appear in this window in real time.
3. The Real Question: How Do You “Describe” the Image in Your Head?
Setting up the environment takes only five minutes. The real challenge is here: when you tell AI, “I want a really cool 3D animation,” there is a huge gap between what AI understands and the image in your head.
Words simply are not a natural medium for 3D. That is not your fault.
The following four methods will help you bridge that gap. They require no technical background—only communication skills.
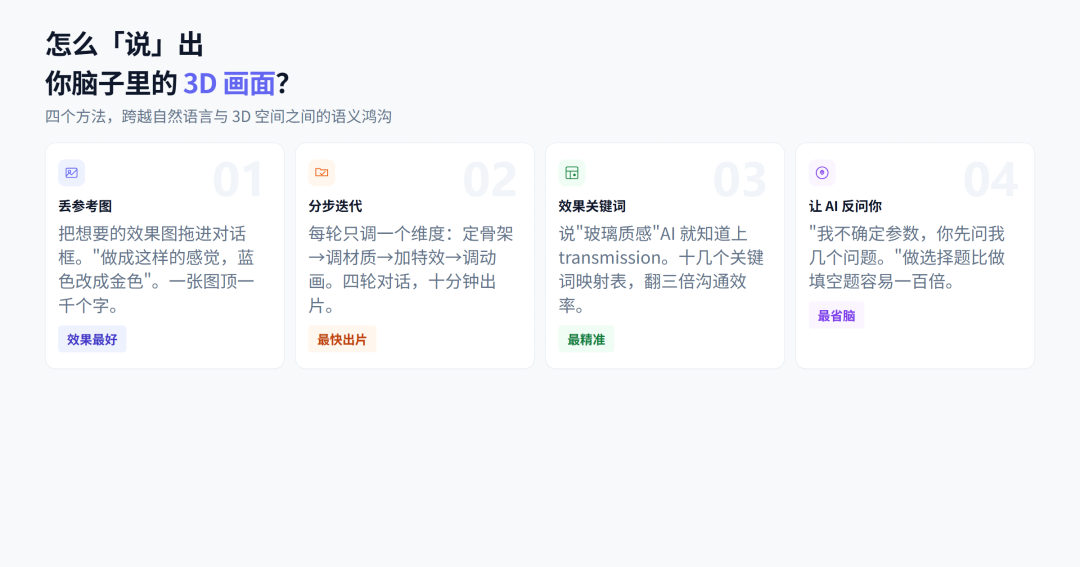
Method 1: Share a Reference Image (Most Effective)
Find an image close to the effect you want—a concept design, a movie screenshot, or a screenshot of someone else’s work. Drag the image directly into the Claude Code chat:
“Create this kind of look with Remotion + Three.js. Change the gold to blue and make the surface of the sphere a little smoother.”
A single image can instantly communicate the level of metallic reflection, particle density, light hardness, color direction, and compositional focus. Even several hundred words may not explain these details clearly.
Method 2: Iterate in Rounds Instead of Saying Everything at Once
The most common beginner mistake is putting every requirement into one prompt. The result is usually a total mess.
The right approach is to adjust just one dimension per round:
First: “Make a sphere that slowly rotates around the Y-axis.” (You see it rotating in Studio → continue.) Second: “Change the sphere to transparent glass. Add a light source coming from the upper left.” (The glass sphere appears → continue.) Third: “Add a ring of small particles around it, like a planetary ring. Make them glow.” Fourth: “Have the particles appear gradually during the first two seconds, suddenly accelerate for one second in the middle, then scatter at the end.”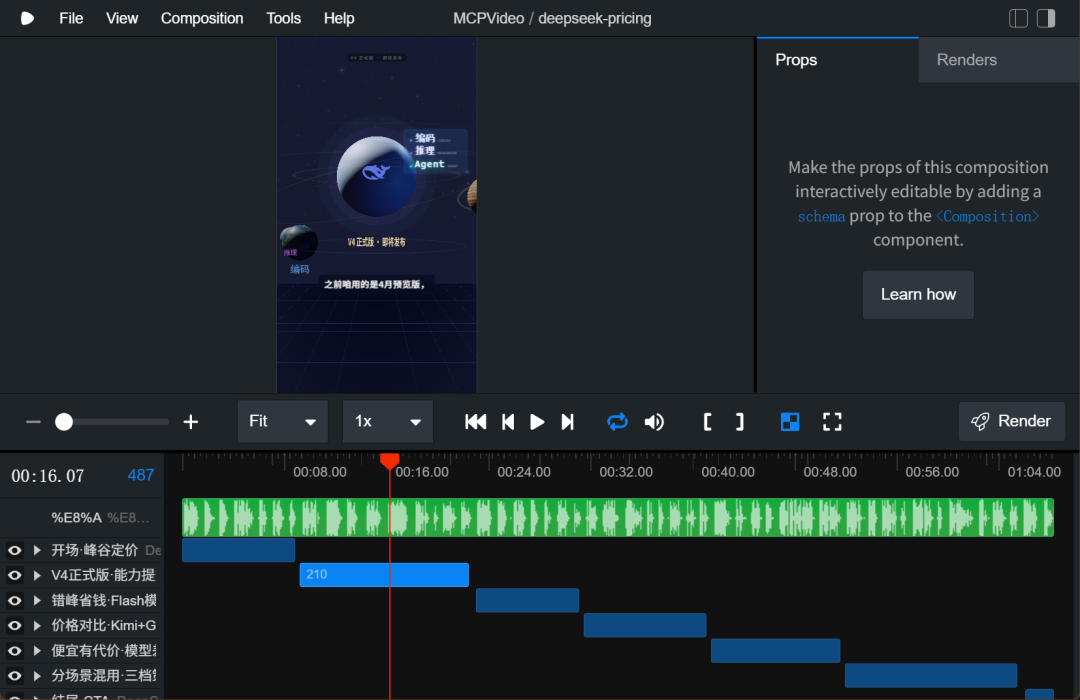
Four rounds of conversation take ten minutes altogether. You can see the result immediately after every step, so you know right away where something went wrong. It is much faster than struggling to write one perfect description and then spending half a day fixing bugs.
Method 3: A Quick Reference for Effect Keywords
You do not need to learn 3D software or shader languages. But mastering a few “effect keywords” can make communication three times more efficient:
What you want|What to say
Metallic, reflective, sharp highlights|“Make it metallic, with a very smooth surface”
Glass, transparent, refractive|“Make it feel like a glass sphere, with light refracting as it passes through”
Glowing like neon|“Add a glow effect, like neon lights”
Stardust and swirling particles|“Add particles around it, like dust in space”
Light trails|“Add a trailing light effect to the motion path”
Flowing, deforming surface|“Make the surface ripple like water”
Fuzzy, matte|“Give it a frosted matte finish”
Blurred background, depth of field|“Blur the background slightly to emphasize the object in front”
Moody spotlight|“Shine a spotlight down and keep the environment darker”
Flat cartoon style|“Give it a cartoon-rendered look”
You do not need to say words like meshPhysicalMaterial or transmission—just say “a transparent glass sphere,” and AI knows how to make it.
Method 4: Ask AI to Ask You Questions
If you have no idea where to start, say:
“I want to create a 3D scene with Remotion + Three.js, but I am not sure which parameters to use. Ask me a few questions first, and I will choose from options.”
AI will ask you: How many objects? Should the light be warm or cool? Fast-paced or slow and gentle? What kind of material? Choosing from options is always easier than filling in the blanks.
4. 3D Animation Prompt Templates—Copy Them Directly

The following prompts have been tested in practice. Copy one, change a few words, and use it. Each one includes the scenarios it works best for.
Template 1: Product Showcase (Simplest)
Create a product showcase animation with Remotion + Three.js. An [object, such as a phone/watch/sphere] is placed in the exact center of the frame, with a [material: metal/glass/frosted] finish and a [color] color. It slowly rotates around the Y-axis. Keep the speed moderate and elegant. A point light shines from the upper left, creating soft shadows. The background is a solid [background color]. The entire animation lasts [duration, such as 6 seconds].Best for: Logo showcases, product appearances, brand animations.
Template 2: Particle Universe
Create a particle scene with Remotion + Three.js. An [object] sits in the center of the frame, surrounded by many tiny glowing particles. The particles are [color] and slowly approach the central object along spiral paths. The background should feel like deep space. Add a subtle glow effect. Duration: [duration, such as 8 seconds].Best for: Tech-style intros, data visualization, conference presentation backgrounds.
Template 3: Light and Material
Create a light and material showcase with Remotion + Three.js. A [shape: sphere/cube/torus] is made of [material], with [material effect: transparent refraction/metallic reflection/neon glow]. A beam of light sweeps from left to right across its surface. The light’s [color] creates a [effect] on the object’s surface. The camera slowly circles the object to showcase the material details. Duration: [duration].Best for: Material studies, design inspiration, concept showcases.
Template 4: Turn Text Into 3D
Turn a piece of text into a 3D effect. The text is [your text], rendered in a 3D font with noticeable depth. Make the text float toward the viewer with a touch of [effect: glow/metal/glass]. The background is [solid color/gradient/starfield]. Duration: [duration].Best for: Title animations, posters, social media cards.
Template 5: Abstract Geometric Art
Create an abstract geometric animation. Several [geometric shapes] are randomly distributed in space, each with a different size and rotation angle. Their material is [consistent material style], and the color scheme is [color 1] + [color 2] + [color 3]. All objects slowly [movement: float/rotate/pulse], like a kinetic sculpture. Add soft lighting and a subtle depth-of-field effect. Duration: [duration].Best for: Artistic creations, wallpapers, concept videos.
You Can Also Add These “Seasonings”
Add these short phrases to the end of any template to fine-tune the effect:
Add this|Effect
“Add a subtle Bloom post-processing effect”|Glowing objects get a spreading halo and a more dreamlike look
“Have the camera slowly orbit the object”|More cinematic camera movement than a fixed viewpoint
“Use a gradient background instead of a solid color”|Avoids monotony
“Add depth of field, with the background slightly blurred”|Makes the subject stand out
“Add an ease-in at the beginning and an ease-out at the end”|Creates a more natural rhythm without abrupt transitions
“Zoom the object in and then back out between the 3rd and 5th seconds”|Adds a “breathing” rhythm to the animation
5. From Prompt to Screenshot—The Complete Workflow
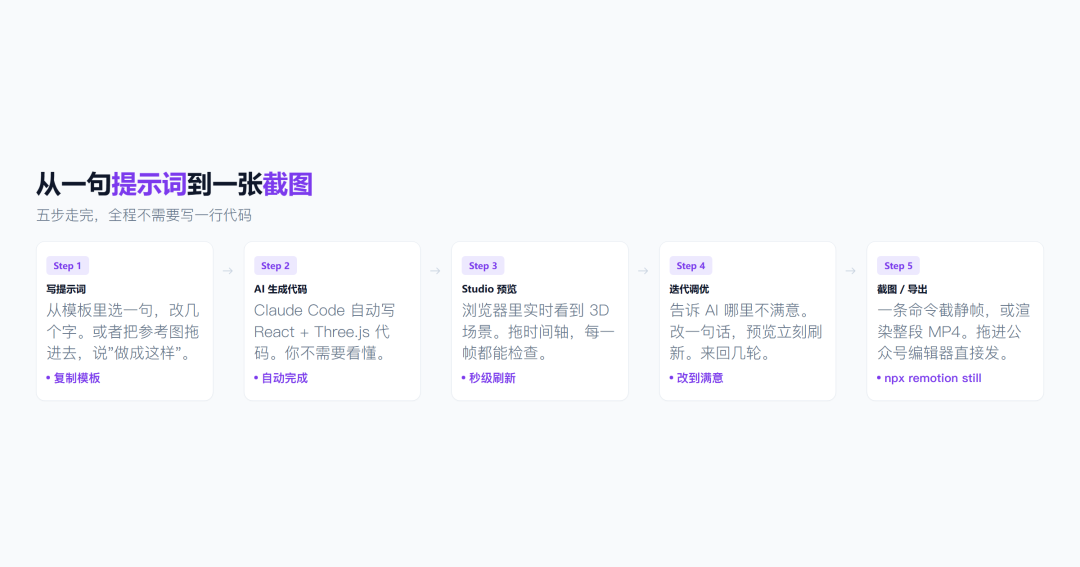
Great. Now that you have written a prompt (or chosen one from the templates above), what comes next?
Step 1: Send the Prompt to Claude Code
Open your Remotion project directory and paste the prompt into Claude Code. If Remotion Skill is installed, Claude will automatically switch to “animation mode.”
Step 2: Preview
After AI generates the code, run:
npx remotion studioA real-time preview will appear in your browser. Drag the timeline to see the result frame by frame.
Step 3: Iterate
Watch the preview and tell AI what you are not happy with:
“The background is too dark; brighten it a little.” “There are too many particles; reduce them by half.” “The rotation is too fast; slow it down by 30%.”
Every time you make a change, Studio refreshes automatically. Keep tweaking until you're satisfied.
Step 4: Take screenshots
Once everything looks right, take a screenshot:
Method A—Capture a single frame (recommended, fastest):
npx remotion still <component-name> output-filename.png --frame=frame-numberFor example, to capture the frame at the 3-second mark (frame 180 at 60fps):
npx remotion still My3DScene screenshot.png --frame=180Wait a few seconds and a 1080p screenshot will be ready. Change the frame number to capture another one—this kind of "single-frame capture" is much faster than rendering an entire video.
Method B—Export the entire video, then capture frames:
npx remotion render My3DScene out.mp4Once rendering is complete, pause the video in any player and take a screenshot. Slower but more complete—suitable when you need multiple consecutive screenshots.
Method C—Take a screenshot directly in Studio:
In the Studio preview window, drag to the frame you want, then right-click → save a screenshot. The most intuitive option, with no command line required.
Step 5: Use it for public accounts / social media
The screenshots are standard PNG files at 1080p resolution. Just drag them into your public-account editor or post them to your social feed.
Need multiple images? Change the parameters in the prompt (color/material/angle) and repeat Steps 1–4. Five variations can be done in ten minutes.
6. In all honesty: What this approach can't do
We've covered what it can do. Now let's talk about what it can't do—and when you should put this approach aside and switch to another tool.
The fundamental limitations of WebGL
WebGL runs in the browser. A browser isn't a professional 3D renderer; underneath, it's a web engine simulating a GPU pipeline. This means:
There is a ceiling on image quality. Blender's Cycles ray tracing and Octane's spectral rendering are both beyond WebGL. There is no true global illumination or ray tracing, and materials are simplified. The image looks "clean" but also "fake," lacking the subtle indirect lighting and material detail of a true renderer.
Scene complexity is limited. A few tens of thousands of triangles can still run smoothly, but performance starts dropping once you reach a million. Particle systems begin to lag when they exceed ten thousand particles. In professional 3D software, a character model with several million faces is commonplace.
There is no physics simulation. Cloth movement, fluid splashes, rigid-body collisions—tasks that take a couple of clicks in Blender require you to build everything from scratch in WebGL, and the result is still simplified.
Rendering is slow. A complex 30-second 3D scene may take several hours to render. A similar scene may take only a few minutes using GPU rendering in Blender.
WebGPU is still on the way
WebGPU is the next-generation standard and is faster than WebGL. But browsers only began preliminary support in mid-2025—Firefox and Safari are still catching up, Three.js support for WebGPU remains experimental, and the API may still change. Using it for a real project today is a gamble.
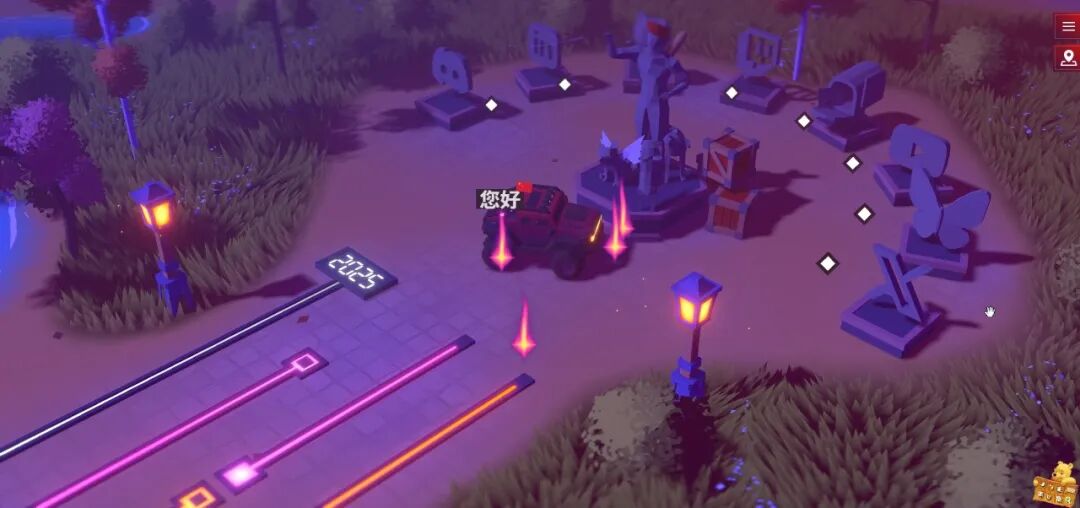
AI-generated code has pitfalls too
Turning one sentence into a 3D animation is genuinely magical, but AI-generated code that "looks right but fails when run" is fairly common:
Simple scenes (one object, one light source, rotating animation): 80% work on the first try
Moderately complex scenes (multiple objects, multiple materials, particle systems): require 2–3 rounds of bug fixing
Complex scenes (custom shaders, post-processing pipelines): AI-generated code is very likely to be unusable
When should you switch tools?
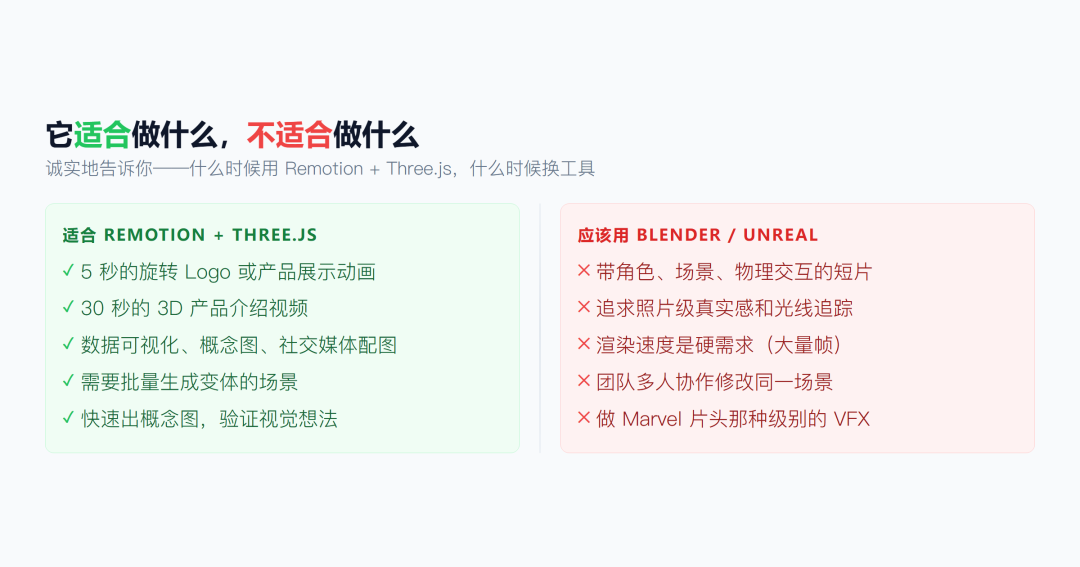
Your needs | Recommended tool
Create logo / product / data-visualization animations | Remotion + Three.js ✅
Create concept art or social media graphics | Remotion + Three.js ✅
Create short films with characters and environments | Blender
Seek photorealistic results | Unreal Engine / Blender Cycles
Rendering speed is essential | Blender GPU rendering
Simply put: Remotion + Three.js is a "tool for quickly producing good-looking visuals," not a "cinematic rendering engine." Use it for screenshots, concepts, and visual exploration—it is extremely fast and lightweight. But don't expect to create the VFX for Dune with it.
7. The ultimate resource roundup
Remotion resources
Resource | Description
Official documentation | Exceptionally well written; start here first
remotion-template-three | Official 3D starter template, ready to use out of the box
Remotion Workshop | A free 52-minute tutorial led by the founder
Make Video With Code | A free 1.5-hour hands-on workshop
ByteGrad: Remotion + Claude Code | A hands-on demonstration of using AI to write Remotion code
Claude-Code-Video-Toolkit | Complete toolkit—components + transitions + theme system
remotion-best-practices 3D guidelines | A comprehensive guide to avoiding common 3D pitfalls
Three.js / WebGL
Resource | Description
Three.js official documentation | 300+ runnable examples
WebGL2 & GLSL Primer | Learn GLSL from scratch to mastery and systematically understand the principles
Three.js Bootcamp | 20-hour course including a 3D game project (updated 2026.6)
Three.js Journey | Bruno Simon's classic course
WebGL+Three.js Fundamentals and Practice | 18-chapter structured course in Chinese
Open-source projects—learn directly from them
Project | Why it is recommended
aimees-papercraft-world.com | Source code and Blender models are fully open source; one of the best learning resources
card-3d-animation | Minimal example of Remotion + 3D, suitable for a first hands-on project
iMoss | 500,000 blades of grass + custom shaders, with stunning results
siri-glsl | Recreates Apple's design language using shaders alone
Inspiration sites—see the upper limit
Work | Keywords
bruno-simon.com | The industry benchmark for interactive Three.js projects
samsy.ninja | WebGPU cyberpunk
jordan-breton.com | 3D floating islands, FWA Site of the Day
bilal.show | Scroll-driven 3D storytelling
Conclusion
Here's the one-sentence summary of what you've just read:
In the past, creating 3D animations meant learning Blender, rendering, and programming. Now you only need Node.js, one prompt, and a reference image.
Find a 3D reference image you like, choose a prompt from the template and tweak it, then give it to Claude Code. Once you see the result in Studio, save a screenshot. Ten minutes later, you'll have a 3D visual you "described" into existence.