What Is DeepSeek Harness Studio?
DeepSeek Harness Studio is a desktop enhancement project for DeepSeek Harness developed by Fufan Space. It uses Electron to host the web workspace, while the desktop main process automatically starts and manages the local dsh web service, allowing users to use and extend Harness without the command line.
It is suitable both for general users who want to install a desktop client directly and for developers who need to read, modify, and build the complete source code. The project provides development preview packages for macOS Apple Silicon and Windows x64, while also making the desktop application, web interface, CLI, feature packages, Python SDK, native modules, examples, and build scripts available.
The current release is a development preview. Desktop installers are available only through the project's GitHub Releases and should not be downloaded from third-party sites.
Core Capabilities Overview
- Electron desktop workspace: Supports application windows, the system tray, single-instance operation, external link handling, and a controlled preload communication interface.
- Local Harness Host: The desktop main process starts
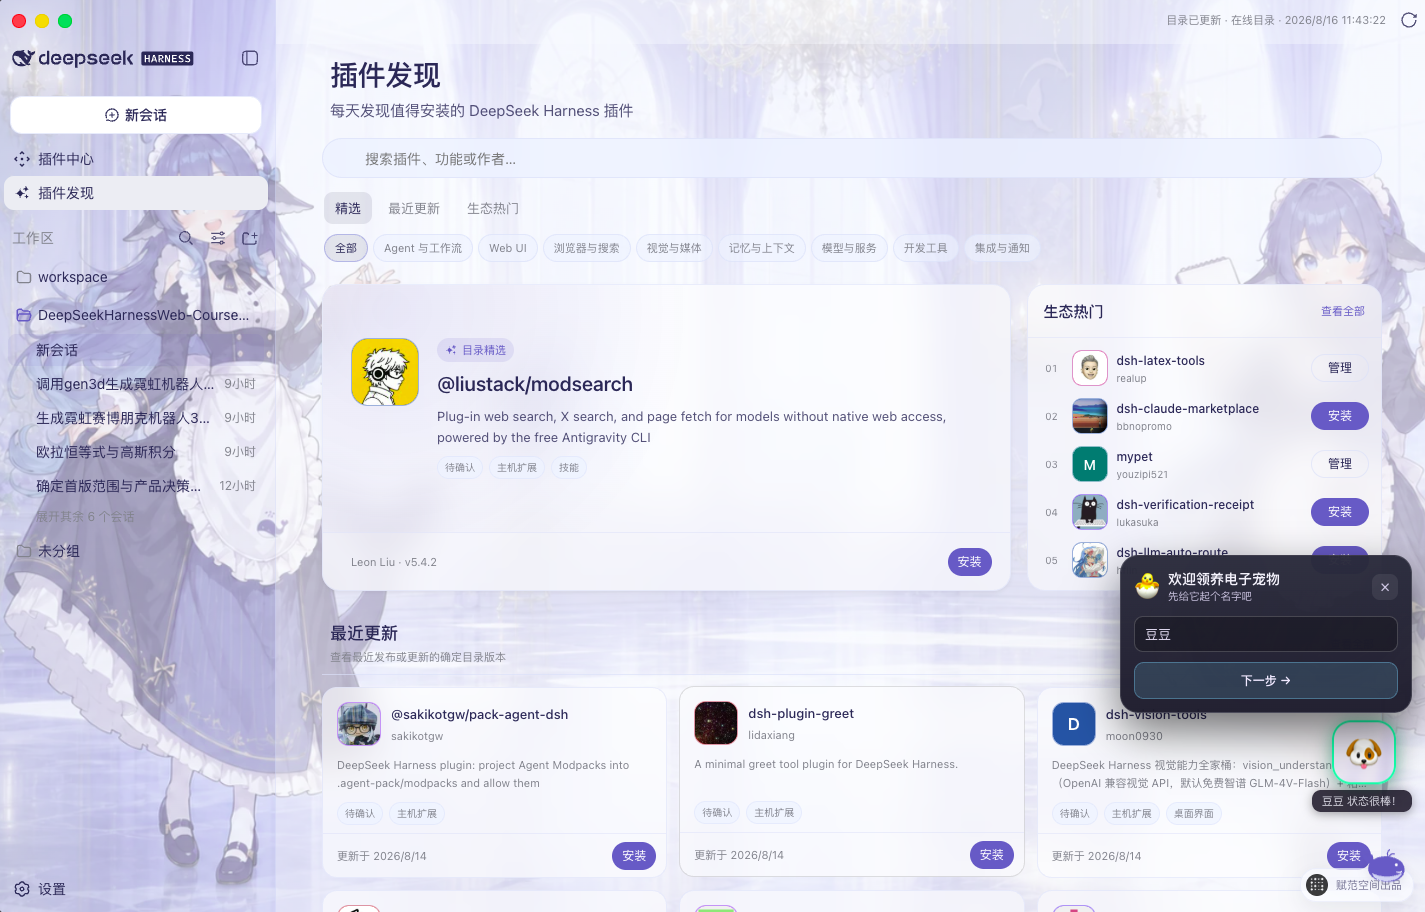
dsh web, waits for the service to become ready, and terminates the Host process when the application exits. - Plugin discovery and recommendations: Browse public plugins by curated selections, recent updates, ecosystem popularity, and use case, or search by name, feature, or author.
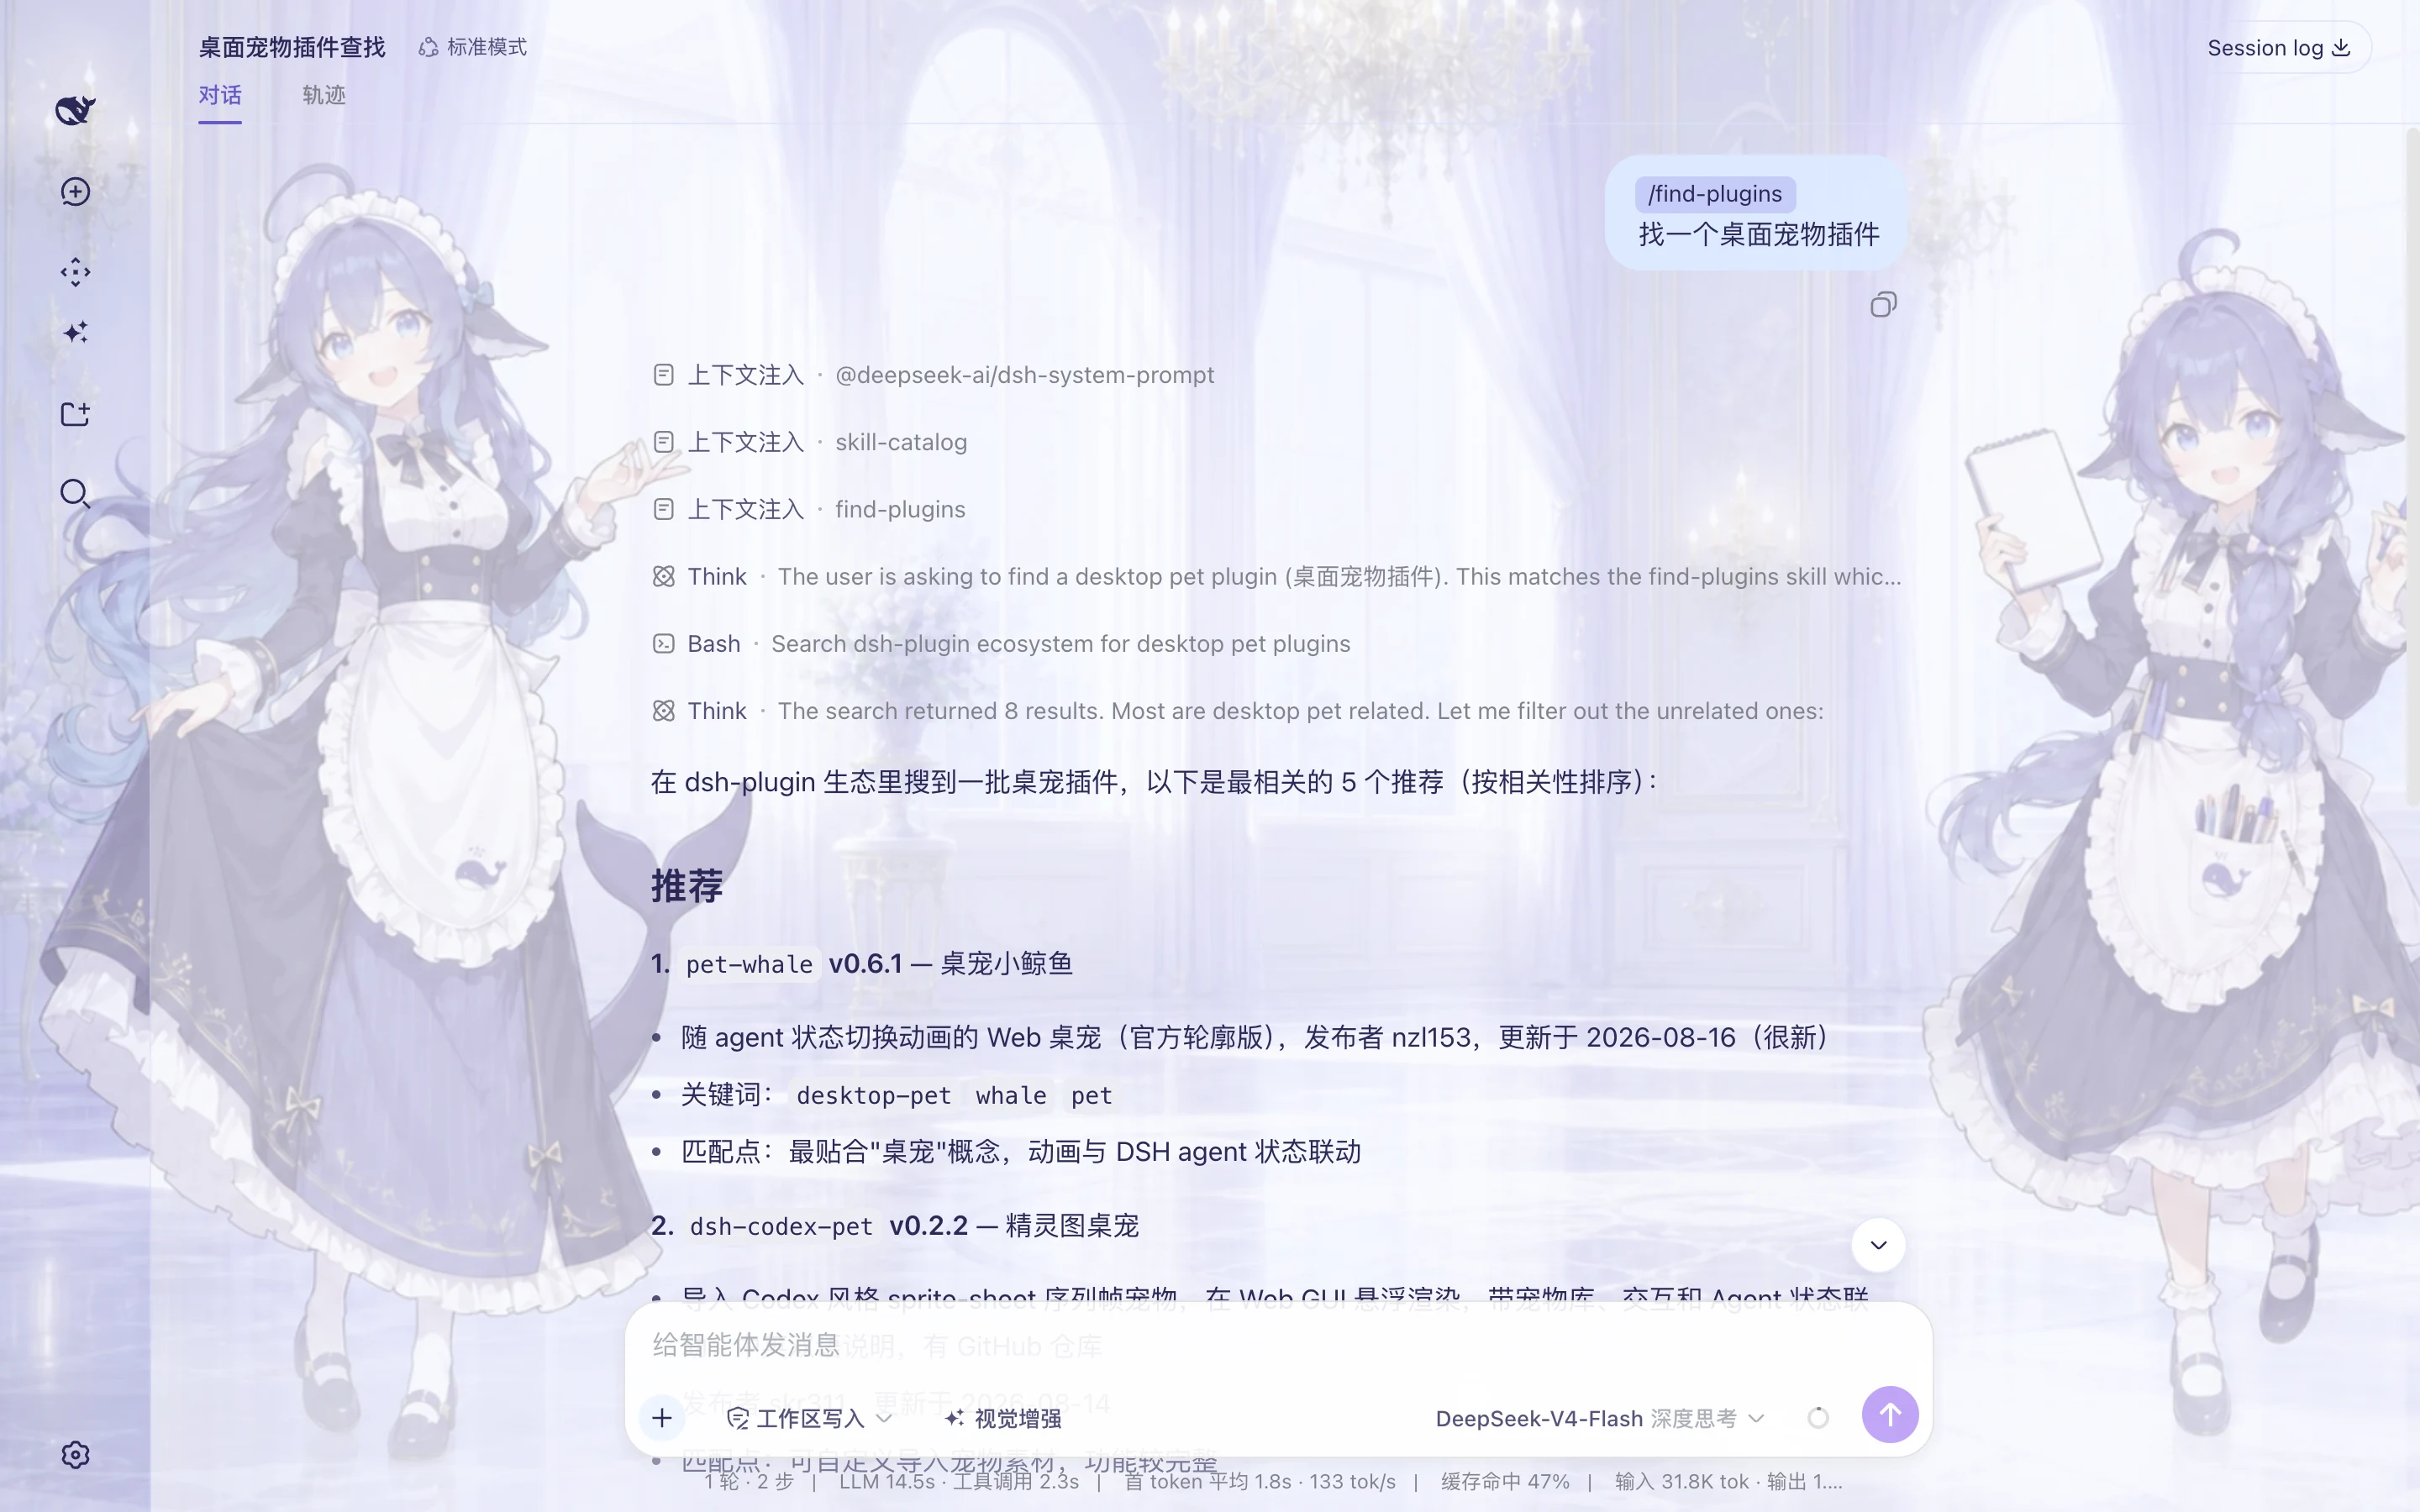
- Agent-powered plugin search: Describe your needs in natural language, and the Agent will query the public
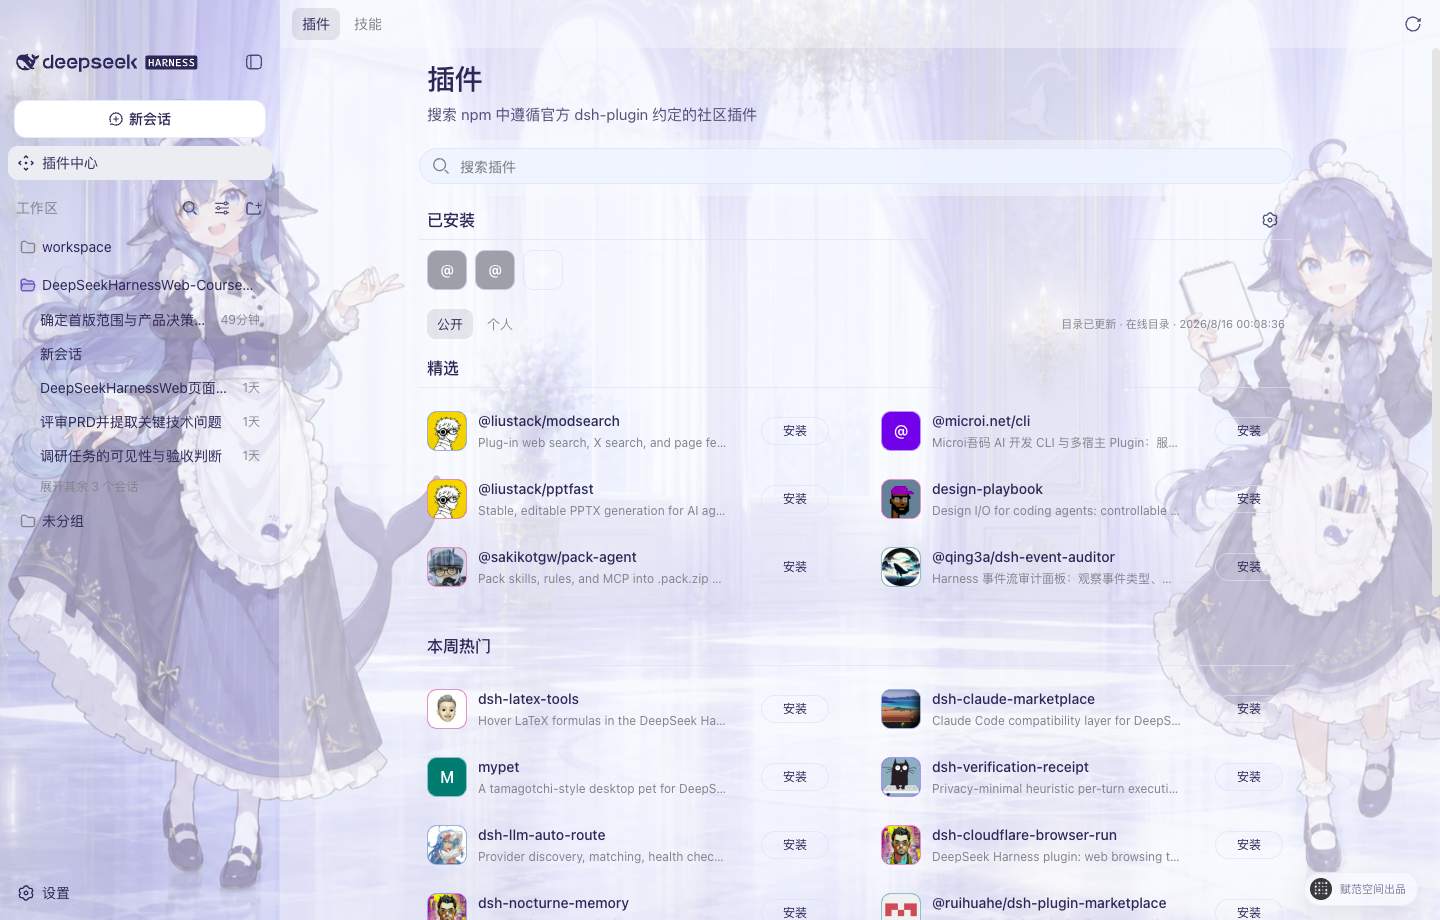
dsh-plugindirectory and provide candidates with reasons for its recommendations. - Public Plugin Center: Before installation, check the resolved version, package integrity, Bundle declaration, permissions, risks, and local compatibility, then manage plugin activation, deactivation, updates, and uninstallation.
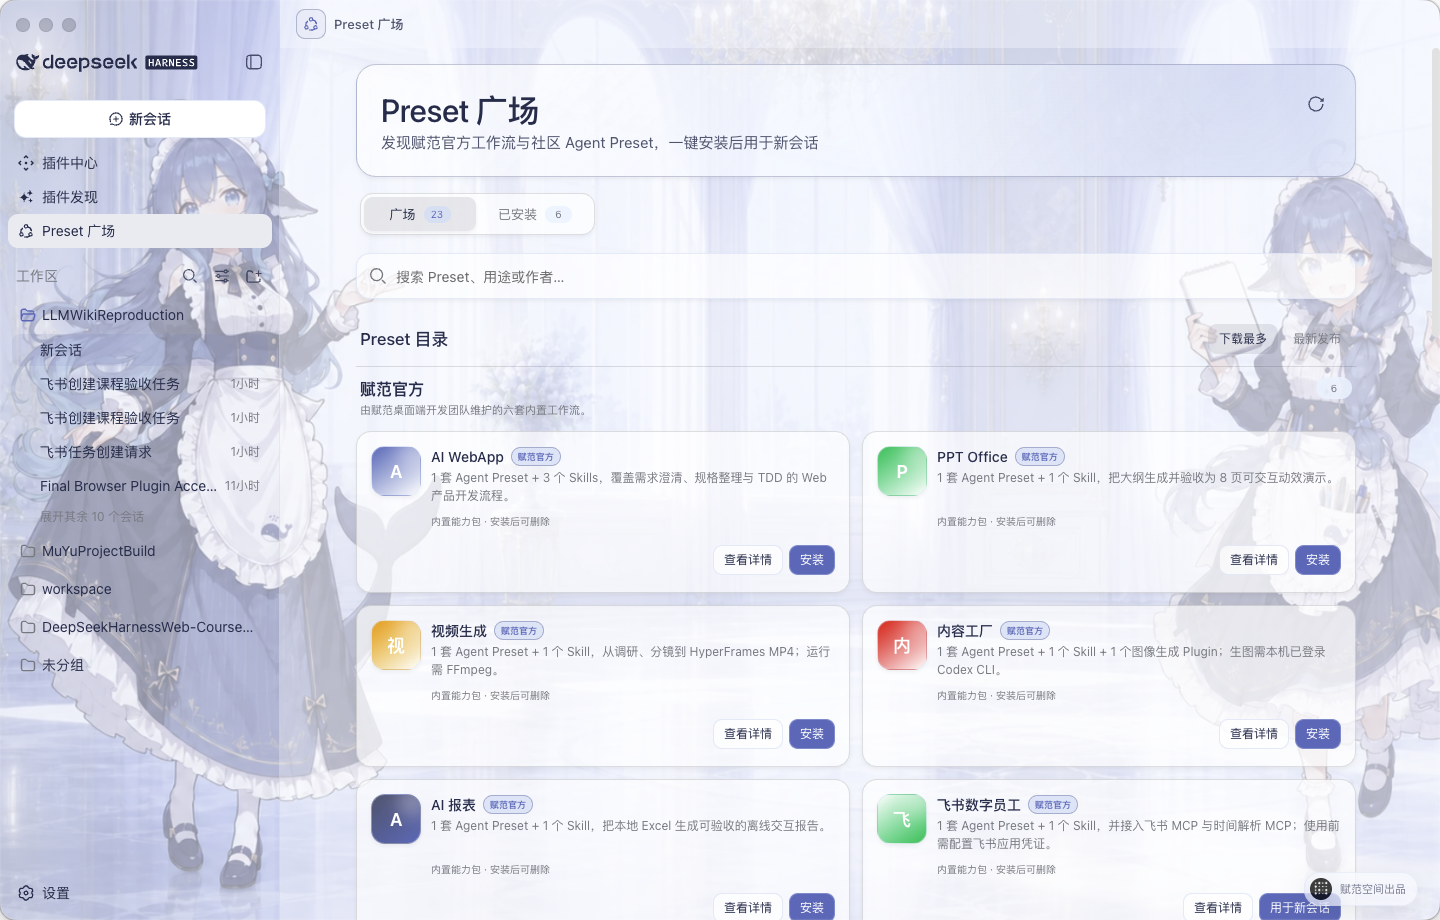
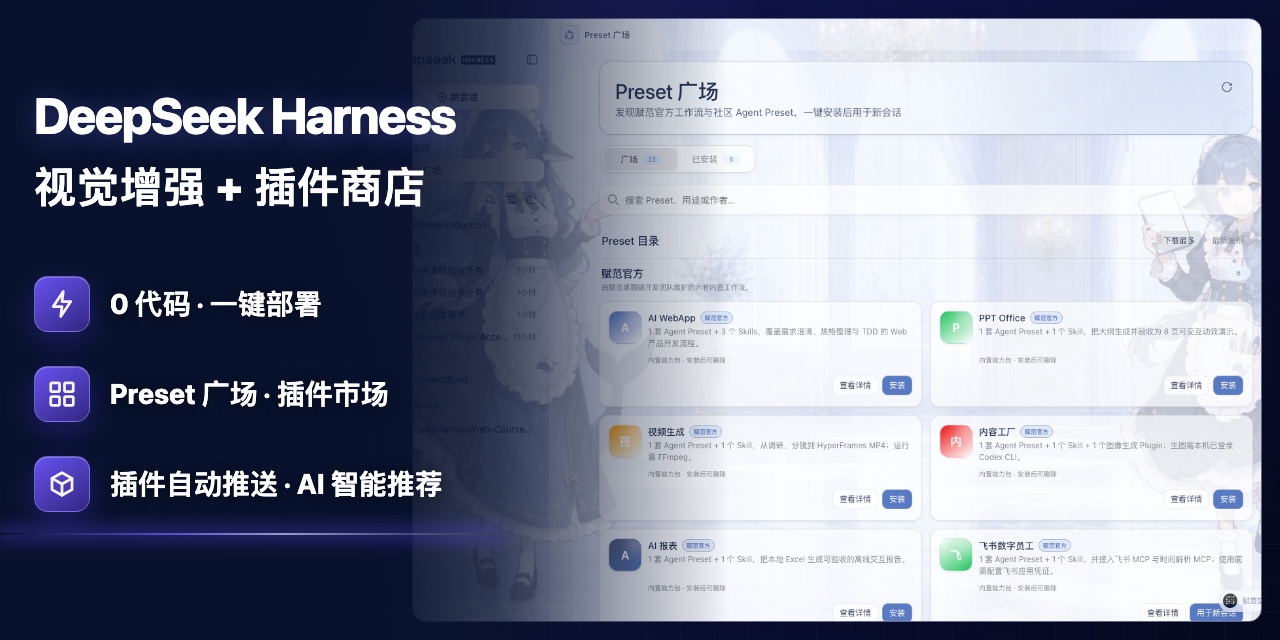
- Preset Hub: Install Agent Presets composed of roles, Skills, tools, and runtime rules, then use them directly to create new sessions.
- App Center: Launch complete AI applications with their own interfaces, data directories, and execution workflows.
- Visual enhancement: Use Alibaba Cloud Model Studio's
qwen3.8-maxto understand attachments or workspace images, then pass traceable visual observations to the current Agent. - Chinese model controls: Select session permissions and the DeepSeek thinking mode from the input area.
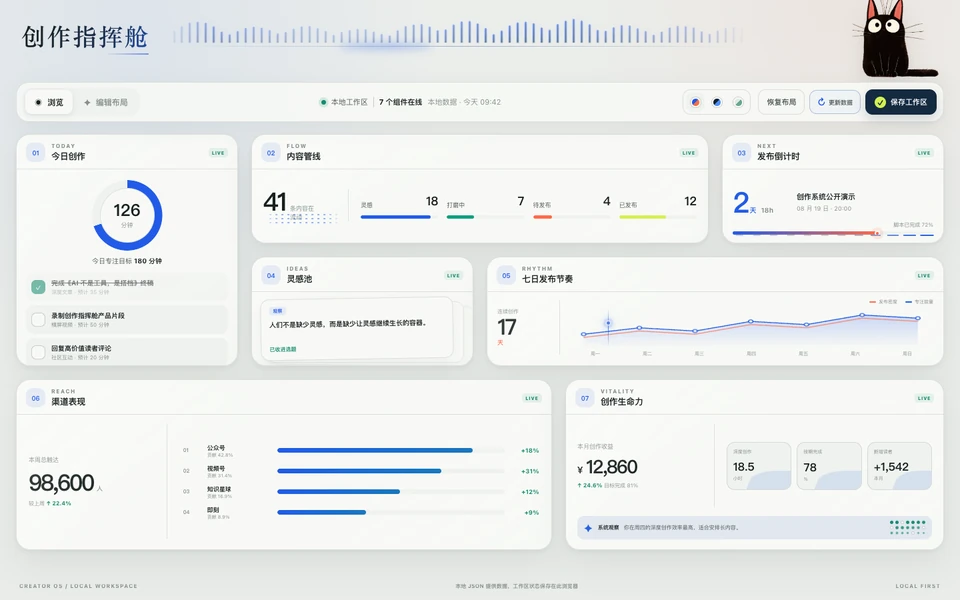
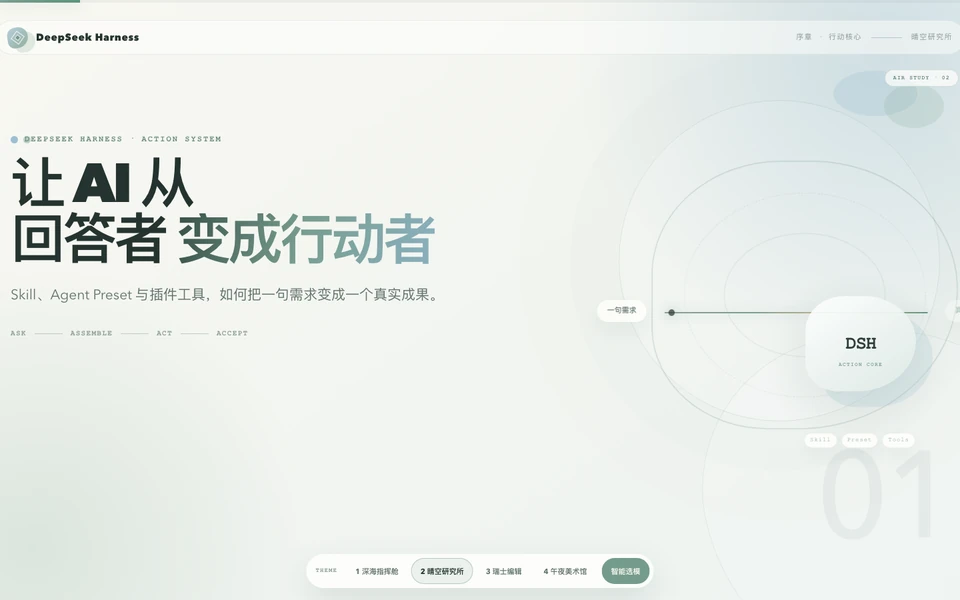
- Desktop appearance: Choose from three built-in themes, or use a local image to generate a background and matching interface colors.
Capabilities Still on the Roadmap
Standalone management for MCP, Skills, and tools; custom Agents and multi-Agent collaboration; background tasks and session recovery; project rules, Hooks, and long-term memory; Git, Worktree, and code review; browser and desktop automation; and mobile remote access and messaging channels are still planned capabilities. Do not mistake these roadmap items for currently available features.
Option 1: Install the Desktop Preview Directly
If you only want to use the application and do not plan to modify the source code, you can download the desktop installer directly. The preview does not require a separate Node.js or pnpm installation at runtime.
Installing on macOS arm64
- Download the ZIP from the project's GitHub Releases and extract it.
- Drag
DeepSeek Harness.appinto the Applications folder. - After verifying the download source and SHA-256 checksum, run the following commands before the first launch.
xattr -dr com.apple.quarantine "/Applications/DeepSeek Harness.app"
open "/Applications/DeepSeek Harness.app"
If the application is located elsewhere, replace the path in the commands with its actual path. Because the current preview package has not yet been notarized by Apple, perform this step only for an installer obtained from the project's official GitHub Releases and successfully verified. Do not use it for applications from unknown sources.
Installing on Windows x64
- Download
DeepSeek-Harness-Desktop-Windows-x64-0.1.0-rc.10-Setup.exe. - Run the installer and follow the on-screen instructions to complete the installation.
- Launch DeepSeek Harness Studio and enter the workspace.
The stable release process is separate from the preview release process. The README states that stable releases will use tags matching the Desktop version, and installers and SHA256SUMS will be published after platform signing verification is complete.
Option 2: Start the Development Environment from Source
Prepare the Development Environment
Source development requires the following versions:
- Node.js
^22.19.0 || >=24.0.0 - pnpm
11.7.0
You do not need to provide an API Key in advance to install dependencies or start the desktop development environment. Credentials are required only when you actually invoke a model or a specific external service within the application.
Clone and Start the Project
git clone https://github.com/fufankeji/deepseek-harness-studio.git
cd deepseek-harness-studio
pnpm install
pnpm run dev:desktop
dev:desktop builds the required modules and launches the Electron desktop application. The development launcher rebuilds when relevant source files or build inputs change.
If an incremental build behaves unexpectedly, or if you modify a module that requires a complete rebuild, run:
pnpm run dev:desktop:rebuildCommon Development Commands
pnpm run dev:desktop: Build the required modules and start the desktop development environment.pnpm run dev:desktop:rebuild: Force a complete rebuild before starting.pnpm run build: Build the Host, client, web application, and desktop application.pnpm run package:desktop: Generate an unpackaged desktop application for the current platform.pnpm run typecheck: Run TypeScript type checking.pnpm run test: Run Vitest unit tests.
Basic Usage: Create and Control Sessions
Configure Models and Credentials
After launching the desktop application, configure the model services and credentials you plan to use on the Settings page. Do not write API Keys into the source code or commit them to Git. Models and API Keys are managed centrally on the Settings page, while the input area shows the current DeepSeek model and lets you adjust the current session.
Select Session Permissions
The input area provides three permission levels in Chinese:
- Read-only: Suitable for code reading, analysis, explanations, and tasks that do not require file modifications.
- Workspace write: Allows the Agent to modify the current workspace and is suitable for routine development tasks.
- Full access: Grants broader permissions. You must confirm the risks before enabling it.
The permission selected in the input area applies to the current session. General settings determine only the default permission for future sessions. Start with the lowest permission level that meets the task's needs.
Adjust the DeepSeek Thinking Mode
For the current session, you can select Thinking Off, Deep Thinking, or Maximum Thinking. The interface does not display speed levels that DeepSeek does not support. You can turn thinking off for simple questions and increase the thinking level as needed for complex research, code analysis, or multi-step tasks.
Discover and Install Plugins
Browse the Plugin Discovery Page
- Open Plugin Discovery from the left navigation.
- Browse directory picks, recently updated plugins, ecosystem favorites, or use-case categories.
- Search by plugin name, feature keyword, or author.
- Review the description, version, author, and update time.
- Select a plugin, then open the Plugin Center to install it.
Use-case categories include Agents and workflows, Web UI, browsers and search, vision and media, memory and context, models and services, development tools, and integrations and notifications.
Ask the Agent to Find Plugins Using Natural Language
If you do not know the exact package name, enter your requirements in Plugin Discovery. For example:
Find a plugin suitable for a desktop pet use case, and provide the version, author, update time, and reason for recommending each candidate.The application sends the requirement to the current Agent as a /find-plugins request. The Agent performs a read-only query of the public dsh-plugin directory and returns relevant candidates. Recommendations are based on public directory metadata and do not mean that a plugin has passed local installation checks.
Search and installation are separate steps. After confirming the package name, you should still use the Plugin Center to check the version, Bundle declaration, permissions, risks, and compatibility.
Install and Manage Plugins
- Open the Plugin Center and select the target plugin.
- Review the resolved version, capabilities, permissions, compatibility, and risk information.
- Confirm the installation. The application will download the package and verify its identity, integrity, and Bundle declaration.
- After installation, the desktop application restarts the Harness Host and verifies its runtime status.
- Use the management menu in the installed section to enable, disable, update, or uninstall the plugin.
Uninstalling a plugin preserves its configuration and data by default. Deleting the data requires a separate confirmation, reducing the risk of accidentally removing configuration.
Create Standardized Workflows with the Preset Hub
A Skill tells an Agent how a category of tasks should be completed. A Plugin or MCP provides actual tools and connections to external services, while an Agent Preset assembles roles, Skills, tools, and runtime rules into a reusable way of working.
Install and Run a Preset
- Open the Preset Hub from the left navigation.
- Search by name, purpose, or author, or sort by download count or update time.
- Open the details page to review the role, Skills, tools, external dependencies, and source information.
- Click Install. The desktop application verifies the source, size, digest, and archive paths, then writes the Preset to the local user Preset directory.
- Open Installed and click “Use for New Session.”
- Submit your task in a new session configured with the corresponding role and working rules.
You do not need to restart the Host after installing a Preset. User Presets can be deleted and reinstalled, while system Presets are protected. Local operations involving installation, deletion, and new session creation are performed only in Desktop. Browser development mode is primarily for viewing and validating the interface and does not modify local Presets.
Six Built-in Workflows
- AI WebApp: Delivers a runnable web product through requirement clarification, specification refinement, TDD, type checking, building, and browser validation.
- PPT Office: Generates an eight-page, four-theme, single-file HTML presentation with semantic animations. It does not currently generate
.pptxfiles. - Video Generation: Handles research, briefs, design specifications, storyboards, source code, and 16:9 MP4 rendering. The environment requires FFmpeg and ffprobe.
- Content Factory: Converts a long-form article into one to ten visual content cards with a consistent style. Actual image generation requires a locally installed Codex CLI that is signed in and has ImageGen capabilities.
- AI Reports: Analyzes local Excel files in read-only mode, produces an interactive single-file HTML report with no CDN dependency, and embeds only aggregated data in the report.
- Feishu Digital Employee: Converts natural language into real Feishu tasks. Initial use requires Feishu application credentials and a default assignee.
Preset Usage Example
Using AI Reports as an example, you can install the Preset, create a new session with it, and submit:
Analyze the sales data Excel file in the workspace in read-only mode, verify the data baseline, generate an interactive HTML report that can be opened offline, and explain the source of each aggregated metric.Whether the task can be completed still depends on the workspace files, the dependencies declared by the Preset, and the local environment. Review the external requirements on the details page before starting.
Use the App Center and FF–LLM Wiki
AI applications serve a different purpose from plugins and Presets. Plugins add tools or localized interface capabilities, Presets organize roles and workflows, and applications provide independent interfaces, dedicated data, and end-to-end execution processes.
Launch the Enterprise Knowledge Base
- Open the App Center.
- Select the built-in FF–LLM Wiki.
- Click “Open App.” Desktop will manage the local runtime environment and open the application in the system browser.
- Import or manage enterprise materials.
- Run document parsing, Wiki compilation, knowledge graph construction, vectorization, and indexing.
- Use intelligent Q&A to review answers with source citations.
FF–LLM Wiki documents, Wiki data, graphs, and SQLite data are stored in an application-specific directory under DSH Home and are not mixed into the current project workspace. Knowledge compilation, browsing, and local retrieval do not require a model key. Before using DeepSeek for generative RAG, configure your own DEEPSEEK_API_KEY in the Harness Credential Center.
The application does not include the development team's API Key. Q&A uses only the evidence snippets matched by the current retrieval and preserves their sources. If the model is unavailable, it explicitly falls back to local retrieval results.
Enable Visual Enhancement
DeepSeek text models cannot directly understand images. Visual enhancement uses the built-in Alibaba Cloud Model Studio qwen3.8-max to read images first, then passes the recognition results to the Agent as traceable visual observations. It does not replace the current primary DeepSeek model or change the current permissions and session workflow.
Configuration Steps
- Click the “Visual Enhancement” toggle to the left of the input box.
- Configure an Alibaba Cloud Model Studio API Key the first time you enable it.
- Verify the credentials using a real image.
- Add screenshots, photos, charts, or images containing text to the conversation, or ask the Agent to read a workspace image by its path.
Supported workspace image formats include PNG, JPEG, WebP, and GIF. Credentials are stored only in a protected local credential file. Visual enhancement can analyze product screenshots, error screens, design mockups, data charts, photos, and OCR content.
Example Visual Task
Analyze the attached error screenshot, extract the error text, identify the code modules most likely to be related, and first provide read-only troubleshooting steps.To make the results easier to verify, ask the Agent to distinguish between “content observed directly in the image” and “inferences based on context.”
Personalize the Desktop Appearance
Open Settings → Background to choose from three built-in appearances: “Official Original,” “Anthropomorphic Big Fat Fish,” or “Cloud Cat.” You can also select a local image and adjust the subject focus and interface glass layer.
Custom images are cropped locally to 1920×1080 WebP and used to adapt the interface color scheme. The original image is not uploaded. This local processing approach offers better data protection when handling private photos or internal design assets.
Reading and Extending the Source Code
Key Project Directories
apps/desktop/: Electron main process, preload, Host lifecycle, and desktop build scripts.apps/web/: Web workspace entry point and desktop integration.apps/cli/: ThedshCLI, runtime configuration, and Agent Presets.packages/: Capability packages for Agents, models, tools, sessions, plugins, and clients.native/: Native sandbox helper modules.python/: Python SDK and related runtime.examples/: Runnable examples and configurations.scripts/: Build, validation, generation, and release scripts.website/: Source code for the project documentation site.vendor/: Pinned Cordis foundation source code.
Recommended Reading Order
apps/desktop/src/main.ts: Understand the overall integration of the window, tray, and local Host.apps/desktop/src/host-supervisor.ts: Review the startup, readiness detection, and shutdown management ofdsh web.apps/desktop/src/preload.ts: Learn about the fixed desktop interfaces available to the Renderer.apps/web/: Read the web workspace loaded by the desktop window.apps/cli/andpackages/: Continue tracing the implementation of the CLI and Harness capabilities.
Advanced Usage Recommendations
Use the Principle of Least Privilege
Prefer read-only permissions for code explanations, information retrieval, and design reviews. Enable workspace write access only when project files clearly need to be modified. Reserve full access for tasks that genuinely require broader system permissions and whose scope you fully understand.
Separate Discovery, Verification, and Execution
After an Agent recommends a plugin, do not treat the recommendation rationale as a security conclusion. First use the Plugin Center to verify the version, publisher, update time, permissions, Bundle declaration, and compatibility, then decide whether to install it. For Presets, also review the external dependencies and source information first.
Check Workflow Dependencies First
Different built-in Presets have different requirements. For example, Video Generation requires FFmpeg and ffprobe; actual image generation in Content Factory requires a signed-in Codex CLI with ImageGen capabilities; Feishu Digital Employee requires Feishu application credentials; and generative RAG in FF–LLM Wiki requires the user's own DeepSeek API Key.
Run Checks Before Committing Code
pnpm run typecheck
pnpm run test
pnpm run build
Type checking, unit tests, and a complete build cover different targets. After modifying the desktop Host lifecycle, preload interfaces, or cross-package types, it is recommended that you run at least these three commands in sequence.
Protect Credentials and Local Data
Do not commit credentials for models, Alibaba Cloud Model Studio, Feishu, or other services to Git. Manage keys through the application's Settings page and Credential Center, and check for sensitive configuration before sharing logs, screenshots, or project archives.
Project Relationship and License
DeepSeek Harness Studio is developed on top of the Harness core, Cordis plugin system, and web interface from deepseek-ai/deepseek-harness. This repository primarily maintains the Electron desktop entry point, local Host management, desktop interactions, and supporting development scripts.
The project uses the MIT License. Before using or redistributing it, also review the third-party component license information in the repository.
Conclusion
DeepSeek Harness Studio brings the local Harness workspace, plugin discovery and installation, Preset workflows, complete AI applications, and image understanding together in a desktop interface. General users can get started directly from the official Releases, while developers can use pnpm to launch the complete source environment. In practice, follow four key principles: use the least privilege required, download only from official sources, verify packages before installation, and never commit credentials.