

What Is Life IPO?
Life IPO is a local-first personal data operating system. It does more than track income and expenses: it brings finances, health, knowledge, relationships, AI-assisted decision-making, and team execution into a single measurable, plannable, and reviewable data loop.
The system uses users.id and the JWT sub claim as the unified identity primary key. Each specialized subsystem shares the primary account context. The server determines data ownership from the JWT, and clients cannot change the associated user themselves. This design reduces data silos between tools and provides a unified factual foundation for AI-assisted decision-making.
The project is currently in Alpha. It is intended for personal information management and decision support and does not constitute medical, investment, insurance, tax, or legal advice. Critical decisions should still be reviewed by the user and the appropriate professionals.
Core Modules and Key Capabilities
Financial Assets
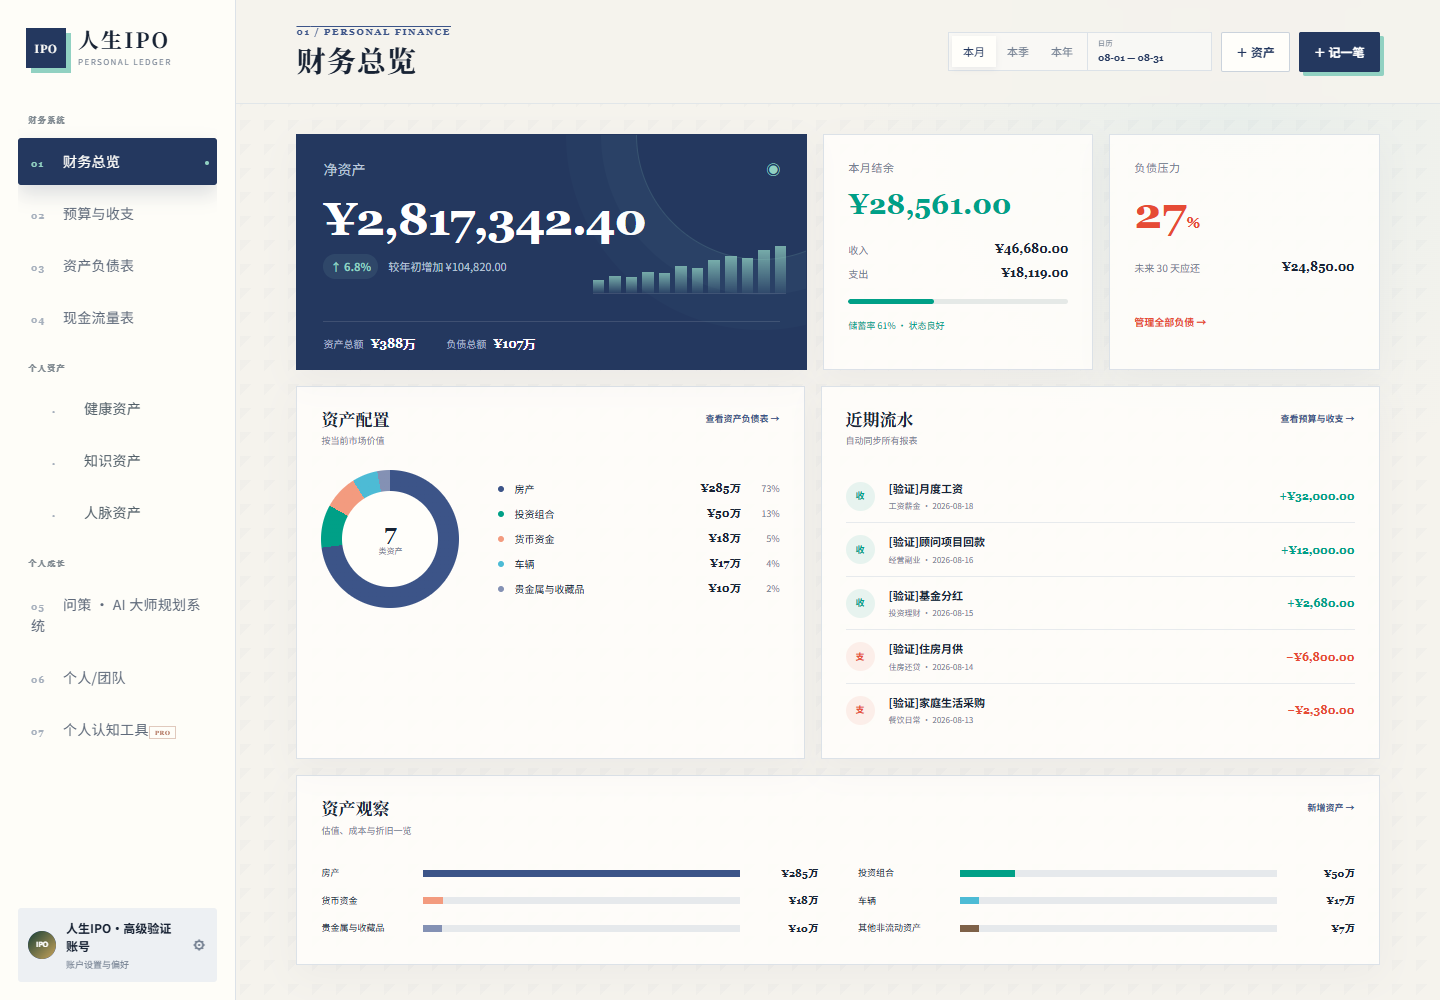
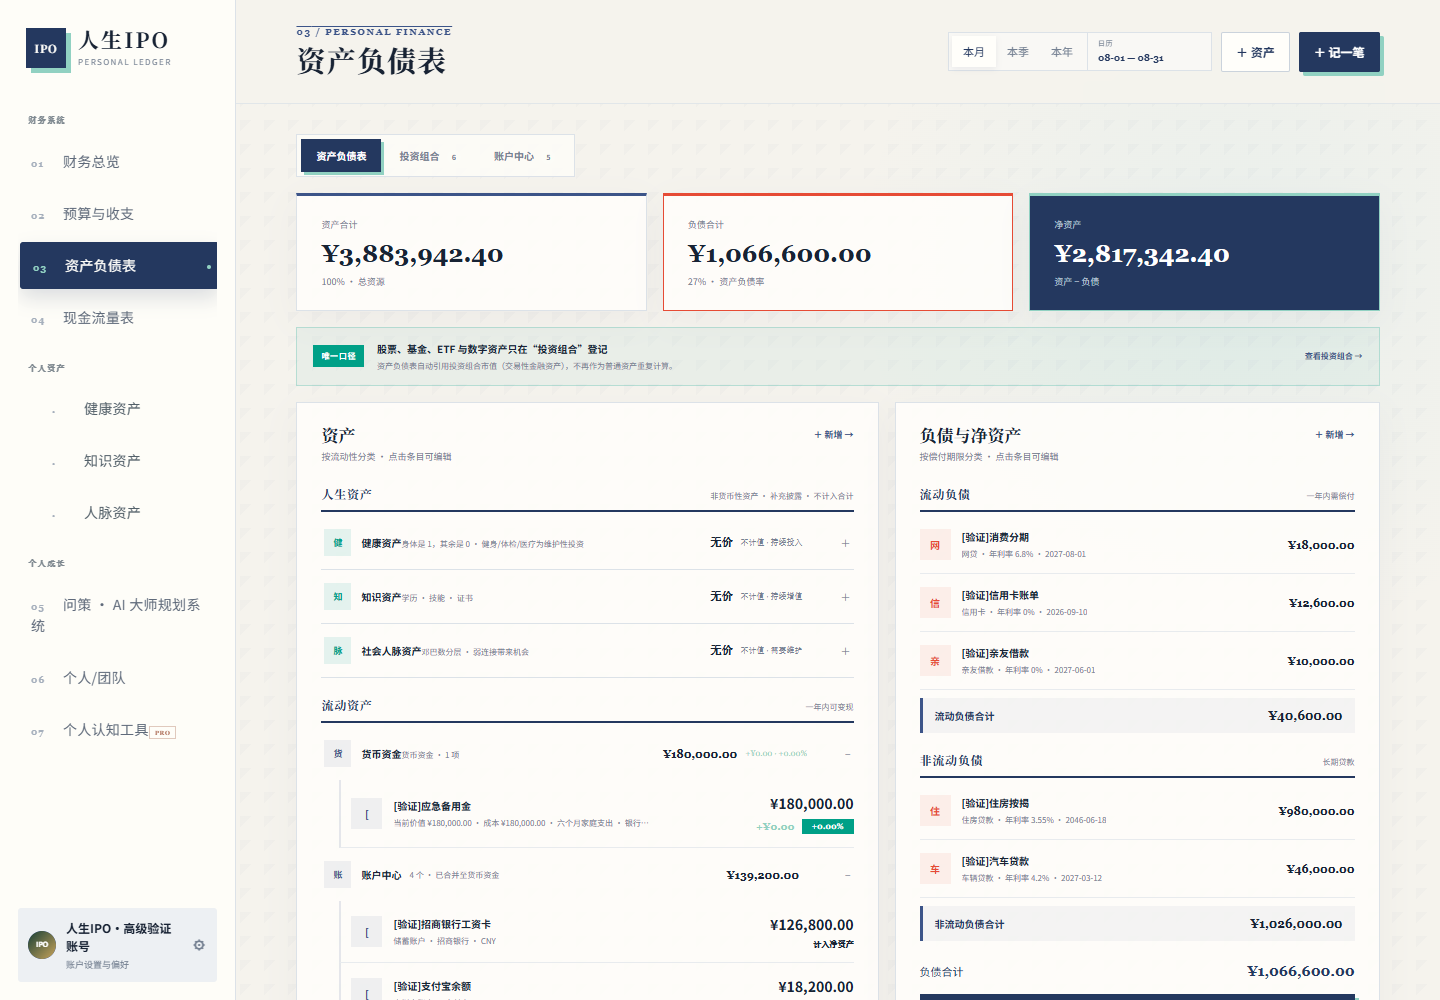
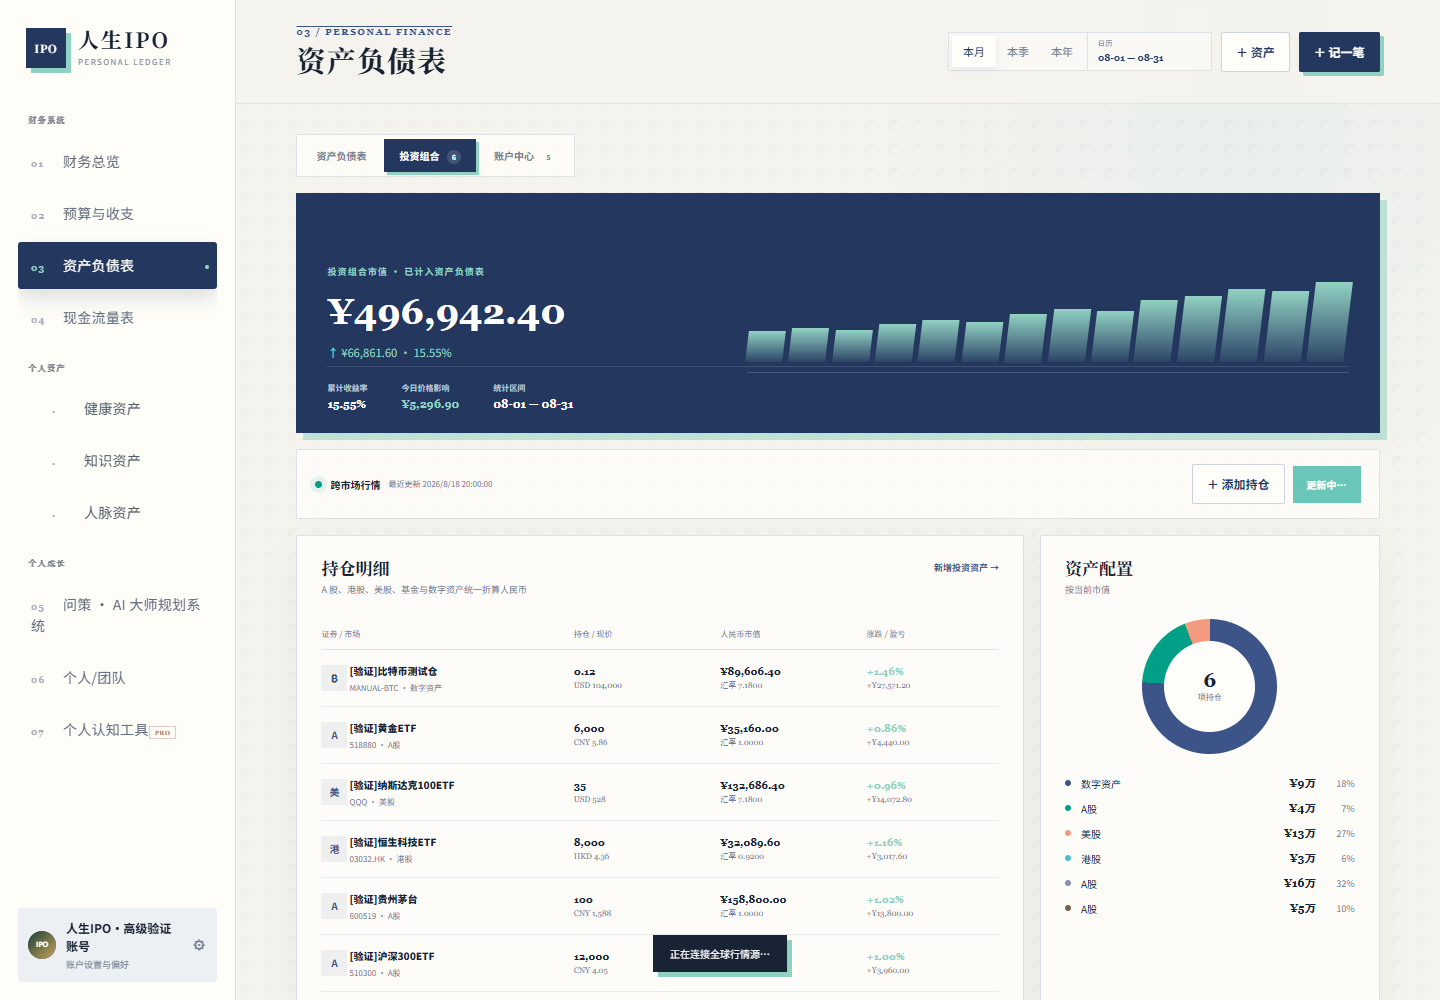
The finance module covers income and expenses, budget envelopes, accounts, assets, liabilities, investment portfolios, and cross-market quotes. It can generate views for balance sheets, cash flow, net worth trends, asset allocation, and more.

Health Assets
The health module supports department cards, examination categories and items, longitudinal metrics, imaging metadata, care pathways, and health insurance coverage. It helps users organize health records through trends, medical timelines, and 3D graphs.
Knowledge and Relationship Assets
The knowledge asset library organizes education, certifications, intellectual property, skills, and work samples, creating a competency radar and an evidence chain of achievements. The relationships module manages contact profiles, relationship strength, interaction timelines, document uploads, and contact insights.
AI Decision Support and the Execution Loop
The decision-support system can proactively read the current user’s five-domain data. Using 19 decision dimensions, multi-round questioning, red-team analysis, and comprehensive adjudication, it produces fact briefs, disagreement networks, action plans, RACI matrices, metrics, and review schedules. The personal and team modules also provide Kanban boards, Gantt charts, OKRs, voting, approvals, and collaboration dashboards.
Prerequisites
The one-click launcher provided in the README currently targets Windows. Prepare the following environment before you begin:
- Windows 10 or Windows 11.
- Node.js
24or later; if you are running only the main site, the minimum version is22.13.0. - Python
3.11or later. npm; for the team module, usingpnpmthrough Corepack is recommended.
The project includes multiple independent services, so first confirm that Node.js, Python, npm, and Corepack can all be invoked successfully from PowerShell.
node --version
python --version
npm --version
corepack --version
Installation and Configuration
Step 1: Install Dependencies for Each Module
Open PowerShell in the repository root and install the dependencies for the main site, relationship management module, and knowledge assets module:
npm install
npm --prefix ".\人脉管理\app" install
npm --prefix ".\知识资产\app" install
Then enable Corepack and install and build the team collaboration workbench:
corepack enable
pnpm --dir ".\团队协作工具台\app" install
pnpm --dir ".\团队协作工具台\app" build
Step 2: Create the Local Deployment Configuration
Copy the sample configuration provided by the project:
Copy-Item ".\.openai\hosting.example.json" ".\.openai\hosting.json"For local development, you can temporarily keep the sample project_id. If you plan to deploy the project, replace it with your own Sites project ID and configure a Cloudflare D1 binding named DB.
Step 3: Launch All Services with One Command
Run the PowerShell startup script from the repository root:
powershell -ExecutionPolicy Bypass -File ".\start_life_ipo.ps1"You can also double-click 一键打开人生IPO.vbs. The launcher checks the fingerprint of each service and waits until all services are ready before opening the main site. Runtime logs are written to the Git-ignored launcher-logs/ directory.
Step 4: Run Only the Main Site
If you do not currently need the specialized subsystems, you can launch only the Life IPO main site:
npm run dev -- --port 3010After it starts, visit http://localhost:3010.
Local Service Addresses
After a full launch, each module uses the following address by default:
- Life IPO main site:
http://localhost:3010 - “Wengu” relationship management:
http://127.0.0.1:3002 - Knowledge asset library:
http://127.0.0.1:3020 - Medical and health graph:
http://127.0.0.1:8767 - AI Master Planner:
http://127.0.0.1:7341 - Starpath team collaboration workbench:
http://localhost:7351/work
The specialized workbenches listen on the local loopback address by default. This is part of the project’s “local-first, minimal exposure” principle. Do not reuse the local configuration unchanged when exposing services to the public internet.
Basic Workflow
1. Establish the Five Domains of Factual Data
After signing in to the main site, you can gradually organize the following data according to your needs:
- Maintain accounts, income and expenses, budgets, assets, liabilities, and investment portfolios in the finance module.
- Organize examination items, longitudinal results, imaging metadata, and care timelines in the health module.
- Enter education, certifications, skills, intellectual property, and evidence of work in the knowledge asset library.
- Maintain contact profiles, interaction records, relationship strength, and follow-up tasks in the relationships module.
- Initiate AI-assisted decision-making in the planning module based on the current user’s data.
The project emphasizes that facts come before AI conclusions. The more complete the data, the easier it is for the decision-support system to distinguish known facts from unknown information that genuinely requires follow-up questions.
2. Review Financial and Life Asset Views
The finance module does more than show where your money went. It also lets you monitor net worth, surpluses, debt pressure, cash flow, and allocation structure. The balance-sheet view presents both financial and non-financial life assets in one place, making it easier to understand your current position as a whole.
3. Use AI Decision Support
The decision-support system automatically reads the five-domain data dictionary of the currently signed-in user. Manual uploads are mainly intended for importing historical snapshots or compatible data belonging to the same user, not for replacing access to current data.
When using the system, carefully review the factual basis, disagreements, falsification conditions, owners, deadlines, leading indicators, stop conditions, and review cadence in the AI output. Even though the system provides red-team analysis and comprehensive adjudication, model output should not be treated as a professional conclusion.
4. Move Plans into Personal or Team Execution
When you are ready to proceed, use the personal or team entry points to turn decisions into trackable actions through Kanban boards, Gantt charts, OKRs, RACI matrices, voting, approvals, and review mechanisms.
Exporting User Data
The system provides a unified data dictionary API that can export finance, health, knowledge, contacts, planning, or all data:
GET /api/data-library?scope=finance|health|knowledge|contacts|planning|all
Authorization: Bearer <JWT>
For example, set scope to finance to export financial data, or to all to export all data. The response uses the life-ipo-json-dictionary format, which is version 4.0 in the README:
{
  "format": "life-ipo-json-dictionary",
  "version": "4.0",
  "scope": "finance",
  "exportedAt": "ISO-8601",
  "owner": {
    "userId": 1,
    "username": "example"
  },
  "datasets": {}
}
Finance, health, knowledge, contacts, and planning exports remove row-level user_id values and exclude passwords, JWTs, API keys, and image binaries. However, exported files may still contain sensitive personal information, so store them in a controlled location and protect their backups.
Key Security Configuration
Life IPO processes financial, medical, and relationship data. Before using or deploying it in production, complete at least the following configuration:
- Set a strong
JWT_SECRETand a separateAI_CREDENTIALS_SECRETfor the main site. - Configure
SESSION_SECRETandHEALTH_DATA_KEYfor the health service. - Set separate
APP_SECRETvalues and database addresses for the knowledge and team services. - Provide the DeepSeek Key through the interface or process environment variables. Do not place it in source code, screenshots, logs, or JSON exports.
- Do not commit
.envfiles, database files, user attachments, build directories, or launcher logs. - For public deployments, add HTTPS, rate limiting, encrypted backups, audit logs, and least-privilege policies.
On the main site, the DeepSeek Key is stored as AES-GCM ciphertext under users.id + provider. At runtime, the plaintext is retrieved only briefly under the same Bearer authorization.
If a key has ever appeared in chat history, logs, or historical build artifacts, revoke it in the provider’s console and generate a new one before continuing the deployment.
Quality Checks and Development Validation
Before modifying the main site or submitting a contribution, run code checks and tests from the repository root:
npm run lint
npm test

python -m unittest discover ".\问策大师规划系统\tests"
Each subproject can also run the npm run build, npm run check, or npm test command listed in its README from its own app directory. Changes involving databases should also document migration and rollback strategies.
Advanced Usage Recommendations
Build Your Data in Stages Instead of Completing Everything at Once
Start with accounts, assets and liabilities, and recent income and expenses. Then gradually add longitudinal health metrics, evidence of knowledge achievements, and interactions with key contacts. This makes it easier to validate data definitions and reduces the burden of initial setup.
Prioritize Trends and Evidence Over Individual Records
One of the project’s design principles is that “records are not the same as insights.” For changes in health, finances, and capabilities, review longitudinal metrics, trend charts, evidence sources, and falsification conditions together. Avoid making excessive judgments based on a single record.
Give Recommendations Stop Conditions
When using the decision-support and team modules, do not record only the objective. Whenever possible, add an owner, deadline, leading indicators, stop conditions, and a fixed review cadence so that the plan can be validated, adjusted, or ended promptly.
Understand the Current Deployment Boundaries
The current one-click launcher primarily supports Windows. Cross-platform launchers and containerized local deployment remain on the roadmap. A unified migration system, versioned database schemas, optional end-to-end encrypted backups, a public demo, and pluggable cognitive tools are also not yet fully complete.
Handle Licensing and Professional Content Carefully
The README explicitly states that the repository currently has no designated open-source license. Publicly visible code does not automatically grant permission to copy, modify, or redistribute it. Contributions involving health, insurance, or investment features should also identify evidence sources and applicable limitations.
Conclusion
Life IPO’s value lies in organizing scattered personal information into unified, traceable data assets and connecting AI-assisted judgments to personal or team execution. After installing the dependencies, configuring deployment, and completing the one-click launch, you can begin by establishing basic data across the five domains, then gradually use exports, AI decision support, RACI, and review features. Because the project remains in Alpha, always prioritize privacy, verify AI conclusions, and maintain the necessary data backups.