

What Is Video Tool?
Video Tool is an AI-assisted video production system that connects recording, editing, visual design, animation, and final editor handoff. Rather than hiding decisions inside a black box, it stores scripts, notes, cut plans, source maps, and animation timings in readable Markdown and JSON files.
The workflow begins with a script and the Eyeline teleprompter. After recording, AI editing tools can transcribe takes, estimate camera synchronization and drift, build playback proxies, and propose a candidate cut. You then review that proposal manually before moving the approved transcript into design and animation.
The system is designed as a set of editable suggestions, not a one-click unattended editor. Human review remains essential at every major decision point.
Key Features
Voice-Following Teleprompter
Eyeline follows your voice while you read, allowing the script to move at your speaking speed. During a session, you can mark flubbed lines and record multiple attempts without interrupting the overall flow. The display can also be mirrored to another screen over the local network.
Each take is stored with supporting material such as microphone audio, a script snapshot, metadata, captions, and a readable take report.
Source-Linked Editing
Eyeline Edit combines waveforms, word-level timings, source clips, and cut controls in a review interface. You can trim cut boundaries against the source, relink camera originals when proxies drift, and export video or audio.
Edits remain connected to their original source intervals. Trimming a clip therefore does not discard the available handles that a finishing editor may need later.
AI-Assisted Cut Proposals
The AI tools can transcribe recorded takes, estimate camera sync and drift, create full-take proxies, identify possible transcription or cut-edge problems, and draft a candidate cut. Importantly, the candidate is written to a separate file instead of replacing the active plan.
HTML Design Boards
The project includes restyled reference boards covering layouts such as processes, comparisons, charts, timelines, code, evidence, layers, and recaps. These boards preserve useful layout and animation mechanics while acting only as neutral starting points.
You can work from the approved transcript, prepare a design brief, adapt an example, or create prompts for Claude Design or another design tool. Colors, fonts, shapes, copy, and layouts should be customized for your own production.
Deterministic Animation
Animated boards expose a seekable timeline. Previewing a particular second in the browser and rendering that same second should produce the same visual state. JSON timelines align graphic changes with approved narration, making motion timing explicit and editable.
Structured Editor Handoff
The final handoff can include the approved cut, WAV audio, transcript, source-linked plan, design assets, rendered boards, captions, timing information, and a finishing checklist. These assets can then be assembled in Resolve, Premiere, or another nonlinear editor.
Requirements
- Operating system: Windows 10 or Windows 11 on x64 hardware.
- PowerShell: Version 5.1 or later.
- Internet: Required to fetch the installation script.
- Administrator access: Not required.
The teleprompter and Eyeline Edit run locally and open in a browser. You do not need a cloud account or API key merely to launch them. However, browser speech recognition may use a browser vendor service, and model weights may download on first use.
Installation and Initial Setup
Confirm that you are using a supported 64-bit Windows system.
Open PowerShell and verify that version 5.1 or newer is available.
Use the repository's PowerShell installation page and follow its displayed instructions.
Choose where your project recordings should be stored. Projects live on your own drive by default, but the destination can be changed before recording.
Open the local browser applications and review the workflow, data-format, customization, and preference documentation before modifying the included skills.
The supplied skills are intentionally unconfigured placeholders. Add your own audience, voice, pacing, editorial rules, design tokens, animation rules, and examples rather than treating the defaults as a finished production identity.
Understand the Five-Stage Workflow
Script -> Record -> Cut -> Design -> Animate -> FinishEach handoff is represented by files that a person or file-aware AI agent can inspect and edit. This makes it possible to automate selected stages without surrendering control of the entire process.
1. Record a Take
Prepare the script before opening the recording workflow.
Launch Eyeline and begin reading while it follows your voice.
Mark flubbed lines and create additional attempts where necessary.
If the camera position requires it, mirror the teleprompter to a second screen on the local network.
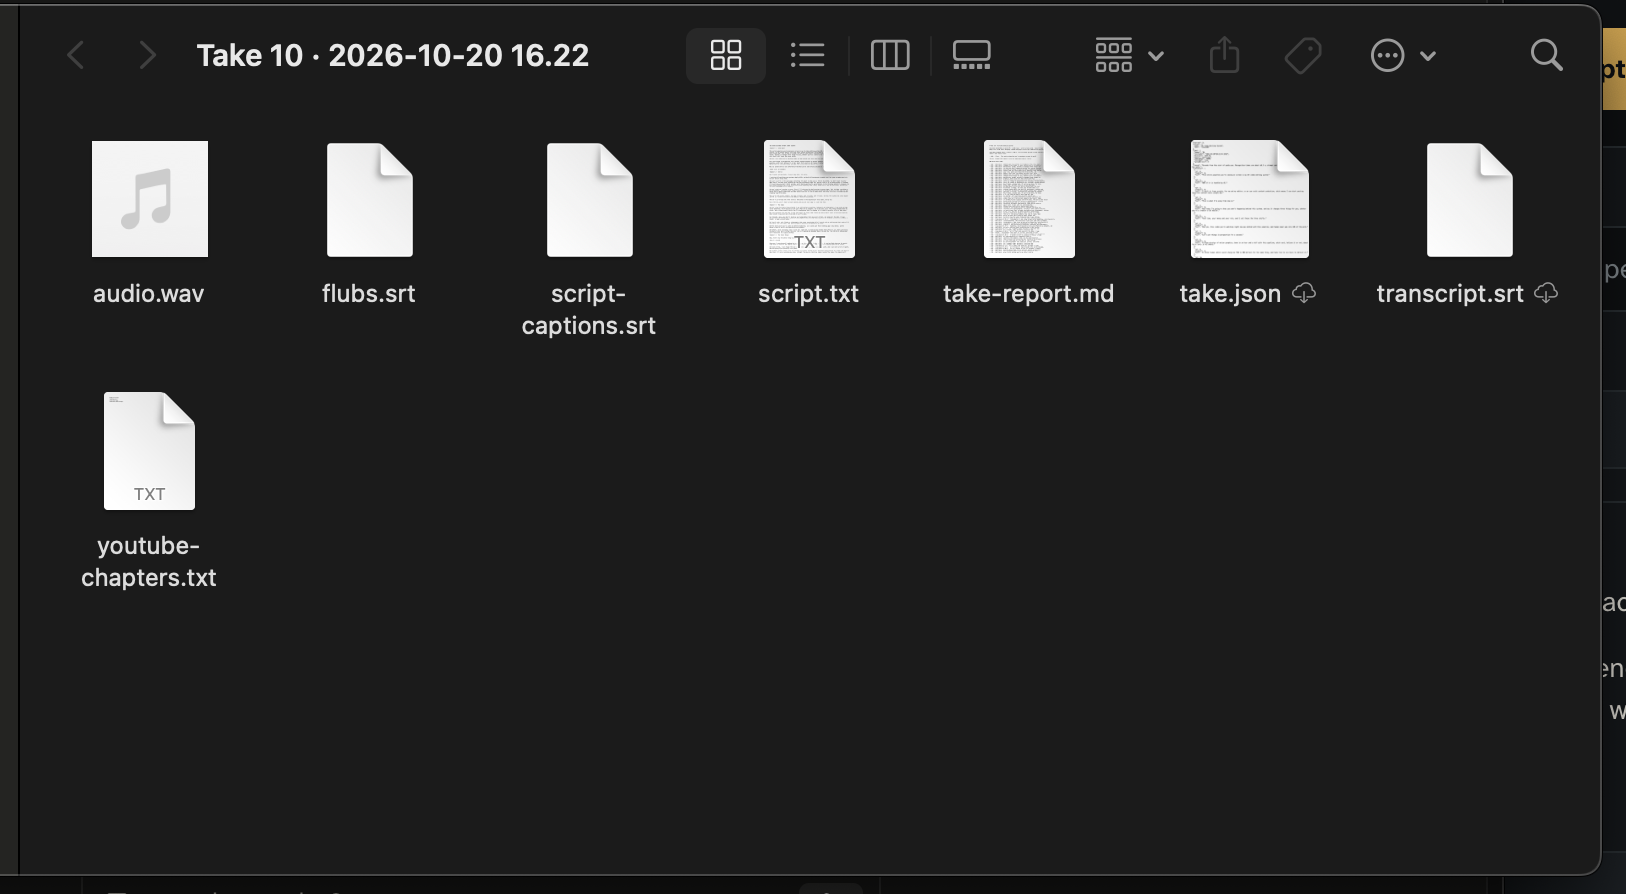
After recording, inspect the take folder and confirm that its audio, script snapshot, metadata, captions, and report are present.
2. Generate a Candidate Cut
Run the AI editing stage to transcribe the takes, estimate synchronization and drift, create full-take playback proxies, and propose a cut. The proposal should remain separate from the working plan until you explicitly accept or adapt it.
Treat transcription warnings, waveform silence, and suspected edge problems as diagnostic clues. Speech recognition can produce an apparently correct transcript even when a word was mispronounced, and silence alone does not prove that a spoken phrase has ended cleanly.
3. Review in Eyeline Edit
Open the candidate plan in Eyeline Edit.
Scrub through the full-take proxy to understand the recording.
Compare transcript words and timings with the waveform and what you actually hear.
Adjust cut edges manually while preserving useful source handles.
Relink camera originals if proxy timing has drifted.
Approve the cut only after checking the proposed decisions.
The approved WAV and transcript become the foundation for downstream visual work. The proxy helps with review, but the source-linked intervals are what preserve the relationship to the original recordings.
4. Create Design Boards
Use the approved transcript to write a visual brief. Select relevant reference boards for the types of information being presented, then restyle them to match your channel. Replace placeholder copy, quotations, and numbers, and verify all production content before rendering.
The included boards demonstrate visual grammar rather than a mandatory brand. Their colors, typography, forms, and layouts are expected to change.
5. Align and Render Animation
Map visual changes to specific moments in the approved narration through a JSON timeline. Use each board's seek behavior to preview timestamps, then render locally. Because the preview and renderer use the same deterministic state, the rendered frames should match what you inspected in the browser.
If narration pacing changes, update the timeline timings instead of manually rebuilding individual frames. This preserves a readable record of how motion relates to speech.
6. Prepare the Final Handoff
Collect the approved cut and its WAV, transcript, source-linked plan, design assets, rendered boards, captions, timing information, and finishing checklist in the expected project tree. Import the assets into your preferred NLE and perform the final assembly there.
Video Tool does not directly operate commercial editors. Its role is to prepare organized, source-aware material for the finishing stage.
Basic Usage Example
Suppose you are producing a scripted tutorial with one camera and several animated explanations. A practical sequence would be:
Write and verify the complete narration.
Record the narration and camera take with Eyeline, marking mistakes as they happen.
Let the AI tools transcribe the takes and draft a separate candidate cut.
Open the proposal in Eyeline Edit, listen to every transition, and refine the boundaries manually.
Approve the cut and use its transcript to identify where charts, diagrams, code, or recap boards are needed.
Restyle appropriate starter boards and replace all placeholder material.
Describe visual changes in a JSON timeline aligned with the approved narration.
Render the boards locally and pass all approved material to the finishing editor.
Advanced Tips
Preview the Editor with Synthetic Media
If you do not yet have a recording, use the demo generator to create synthetic camera and audio media locally. This lets you explore the source-linked timeline and review interface without using a real take.
Keep Candidate and Approved Plans Separate
Do not overwrite the working plan with an AI proposal. Preserve the candidate file as a suggestion, compare it with the current plan, and promote changes only after review. This separation makes experimentation safer and keeps approved work stable.
Preserve Source Relationships
Use proxies for responsive scrubbing, but retain the original source intervals and available handles. If a proxy drifts, relink the camera original rather than treating the proxy as the final authority.
Configure Skills as Editorial Policy
The placeholder skills can encode your intended audience, voice, pacing, design system, examples, and review rules. Updating these Markdown instructions changes how a compatible agent approaches the workflow; it is prompt configuration rather than model training.
Use Any Compatible Agent
The role briefs for recording, cutting, review, design, animation, and handoff can be given to a coding agent that reads files and runs commands. They can also be followed manually as stage-specific checklists. No particular AI agent is required.
Audit Third-Party Material
The project's code and freshly authored templates are released under the MIT license, but TEIN branding is excluded from that grant. Demonstration media, third-party software, and model weights retain their respective credits and licenses. Review those terms before redistributing a customized version.
Conclusion
Video Tool provides a transparent bridge from scripted recording to final editorial handoff. Its main advantage is not unattended automation, but legibility: proposed cuts, transcripts, source links, visual briefs, and motion timings remain accessible to both humans and AI agents. By reviewing every proposal and customizing the placeholder skills and boards, you can shape the system around your own voice and production process.