

What Is Agent Office 3D?
Agent Office 3D is a locally running low-poly 3D office that displays AI Coding Agents as employees in the office. You can see at a glance whether each Agent is working, idle, finished and waiting, or blocked by a permission prompt that needs confirmation.
The project uses demo data by default and does not require connecting to any Agent first. Idle employees make coffee, drink water, use the treadmill, stretch, doze off, or play built-in mini-games; after Minecraft is enabled, employees can also enter a local world through Mineflayer bots.
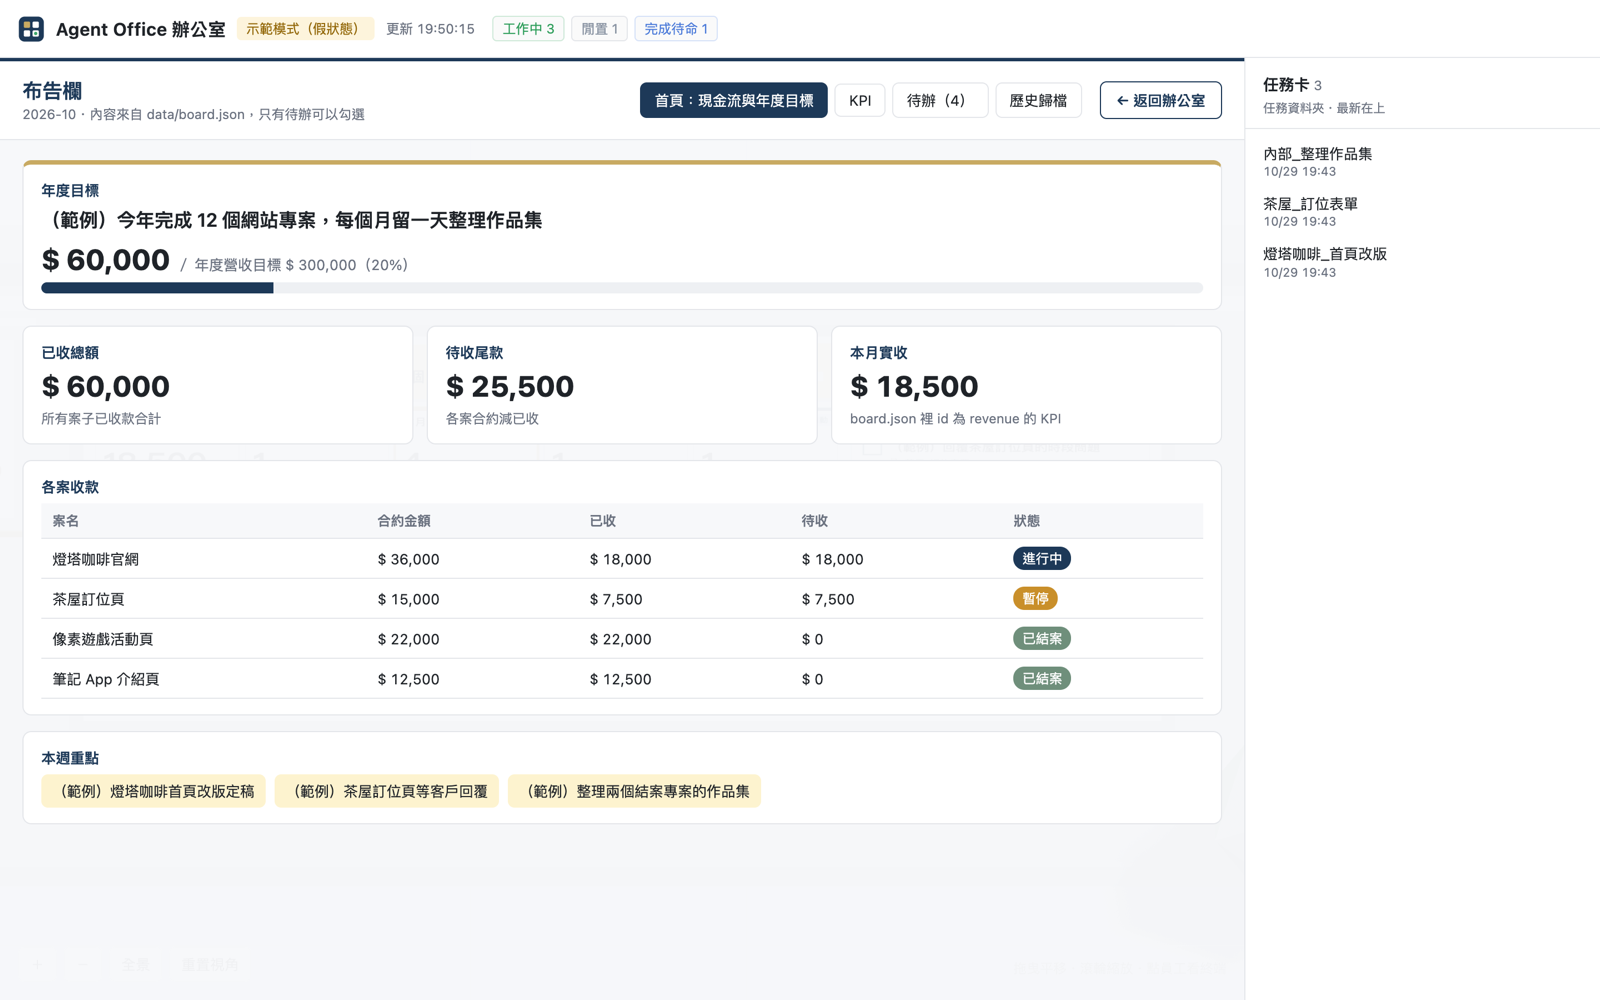
The employees, tasks, projects, and amounts shown on screen are demo data and do not represent real business information.
Key Features
- Real-time employee status: Each Agent has its own desk, status light, and nameplate; a red nameplate with an exclamation mark indicates that confirmation is needed.
- Read-only terminal view: Select an employee to view recent terminal output, but commands cannot be sent from the office interface.
- Bulletin board: Displays annual goals, KPIs, weekly priorities, cash flow, and a to-do list. To-do items can be checked off directly.
- Bookshelf project database: Each book corresponds to a project folder where you can read Markdown documents and screenshots.
- Task list: View the files and full contents in the task folder from the right side.
- Minecraft break activity: Idle employees can use their own Mineflayer bots to mine, chop trees, and build houses. Their first-person view is displayed on the office desk monitor.
Selecting the bulletin board opens a full-screen interface for viewing company information and to-do items.
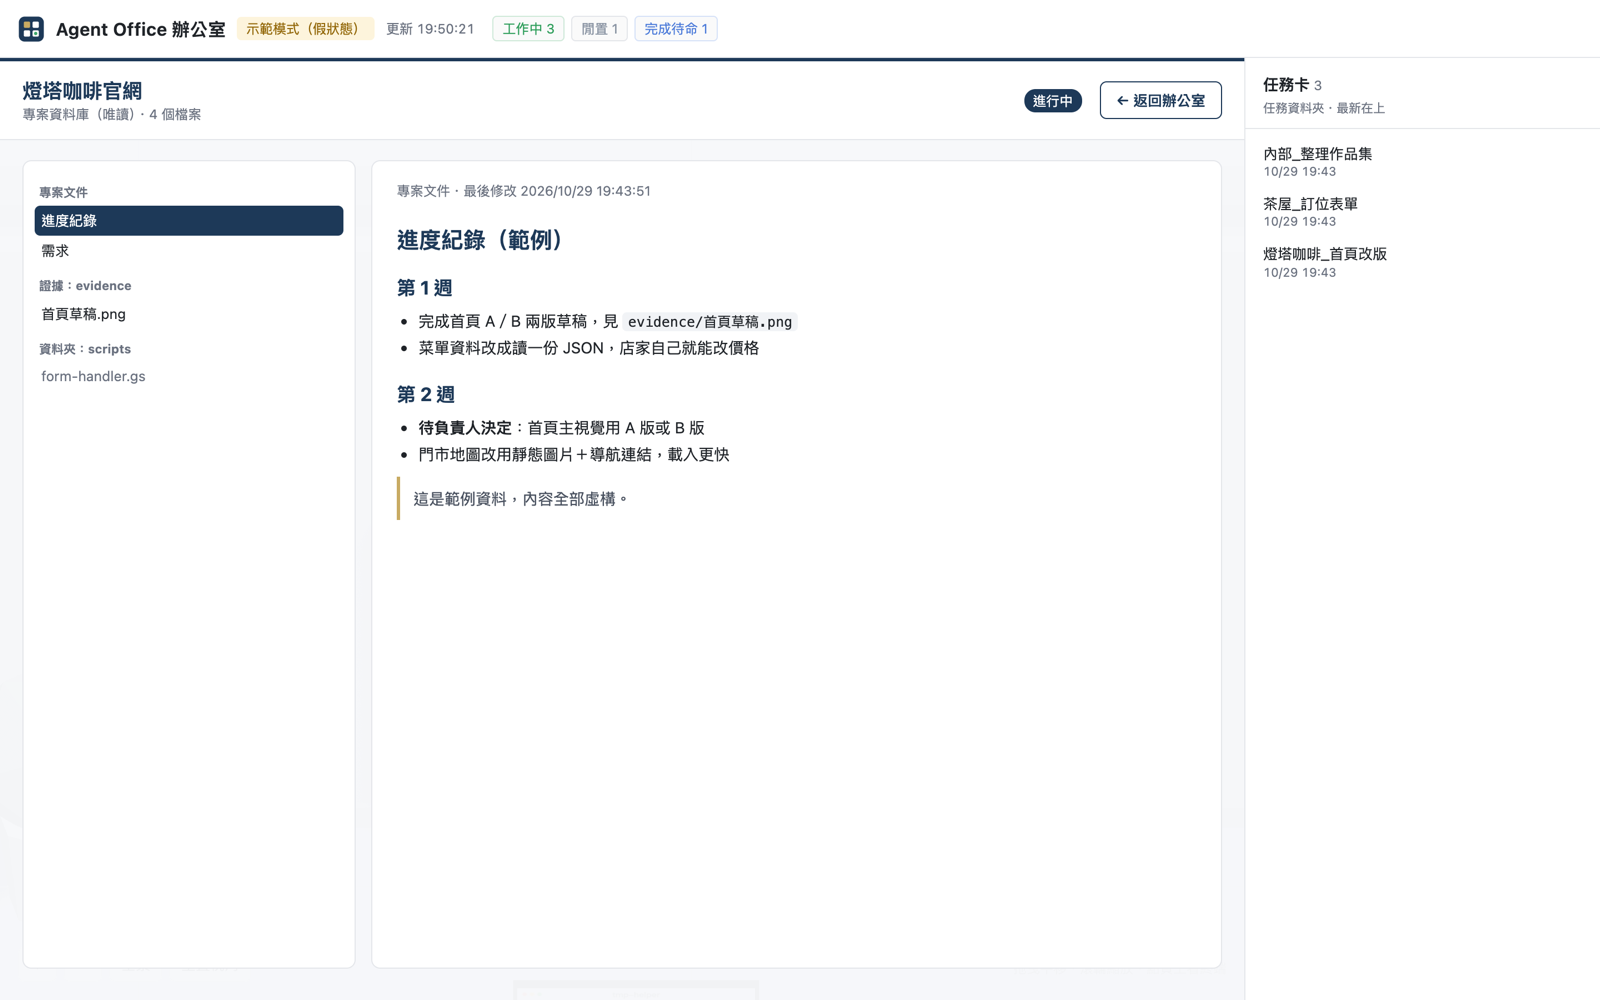
The bookshelf provides a read-only way to browse projects, making it suitable for quickly viewing documents and project assets.
Requirements
- Node.js 20 or later: Required to run the office.
- Java 21 or later: Required only when Minecraft features are enabled.
- A WebGL-capable browser: Chrome, Edge, Safari, and Firefox are supported.
macOS and Linux are the primary supported platforms. Windows is currently experimental. Although CI runs installation, syntax checks, and demo-mode tests, the author has not verified it on physical Windows hardware, and Minecraft has not yet been tested on Windows.
Install and Start the Demo Office
macOS and Linux
git clone https://github.com/jefferysha0627/agent-office-3d.git agent-office-3d
cd agent-office-3d
npm ci
npm start
Windows PowerShell
git clone https://github.com/jefferysha0627/agent-office-3d.git agent-office-3d
cd agent-office-3d
npm ci
npm start
After startup, the program opens http://127.0.0.1:4870/. It uses demo mode by default, and employee statuses rotate automatically, so you do not need to prepare or connect an Agent first. After trying it out, press Ctrl+C in the terminal to stop it.
Installation with an AI Coding Agent
If you use an AI Coding Agent such as Claude Code, Codex, or Cursor, you can open it in the project folder first and then paste the following instruction:
Read this repo's AGENTS.md, install Agent Office for me, and open the Minecraft demo.The Agent will follow AGENTS.md to run npm run doctor, help install and start the demo, and ask whether to connect Herdr and how to customize the company and employees. It will ask for your confirmation before installing system software such as Node.js or Java. The Minecraft EULA must be read and accepted by you personally by entering yes; the AI Agent will not accept it on your behalf. Claude Code users can also enter /setup-office.
Configure the Company, Employees, and Data Sources
First, copy the example configuration file:
cp office.config.example.json office.config.jsonWindows PowerShell users can run:
Copy-Item office.config.example.json office.config.jsonoffice.config.json is not tracked by version control. If the file does not exist, the program uses the example configuration directly. Common fields include:
port: The service port, defaulting to4870.openBrowser: Whether to open the browser automatically after startup.company.name: The name used in the title bar and on the company sign.company.currency: The currency symbol displayed on the bulletin board, such as$orNT$.company.logoandcompany.mark: Paths to the company wordmark logo and icon.owner.name,owner.title: The name and title of the person at the executive desk; the executive desk is decorative and does not receive Agent status.cat.name: The office cat's name.staff[]: The employee list, containingid,title, and uniformcolor, with up to 8 employees.source.type: The status source, which can be set todemoorherdr.data.board,data.projects,data.tasks: Locations of the bulletin board, project, and task data.
Each employee's staff[].id must match the Agent name in the status source. For the related bulletin board and bookshelf data formats, see docs/board-format.md.
Connect a Real Agent: Herdr Mode
Herdr is a terminal multiplexer for Coding Agents. To connect Herdr, first start your Agent with Herdr, then update the configuration:
{
  "source": {
    "type": "herdr"
  },
  "staff": [
    {
      "id": "Your Herdr Agent name",
      "title": "Job title",
      "color": "#4f8cff"
    }
  ]
}
Then run:
npm startThe office only calls Herdr's read-only commands, herdr agent list and herdr agent read. The built-in allowlist blocks other commands, so the office will not send keystrokes or accept permission prompts on your behalf.
To connect another status tool, add an adapter in lib/sources.js that returns the same employee-list format, including names, statuses, and the last few lines of terminal output.
Enable the Minecraft Demo
To quickly watch demo employees play Minecraft, run:
npm run demo:minecraftThis feature requires Node.js 20 or later and Java 21 or later. The first run checks Java, asks you to read and accept the Minecraft EULA, downloads the 1.21.4 server files from Mojang's official version manifest, and verifies the SHA-1. World creation usually takes about 1–2 minutes.
You must personally enter yes to write eula=true. Entering anything else cancels the process, and no Mojang files will be downloaded. This is because the Minecraft server software EULA must be accepted by the person actually running it.
To enable Minecraft in regular office mode, first run:
npm run minecraft:setupAfter setup is complete, set minecraft.enabled to true in the configuration file, then run npm start. The Minecraft server binds to 127.0.0.1 and uses an allowlist to restrict connections. When an employee resumes work, its corresponding bot stops activity; bots operate only when the employee is idle and someone has the office view open.
Watch Employees from Within Minecraft
If you own Minecraft Java Edition, add your player name to minecraft.guests:
{
  "minecraft": {
    "guests": ["YourName"]
  }
}
You can also use an environment variable:
MC_GUESTS=YourName npm run demo:minecraftWindows PowerShell users can run:
$env:MC_GUESTS="YourName"; npm run demo:minecraft- Open Minecraft Java Edition 1.21.4 on the same computer.
- Open multiplayer, choose Direct Connection, and enter
localhost:25570. - After joining, you will automatically switch to spectator mode, allowing you to fly and pass through walls without changing the world.
- Press the number key
1or use the middle mouse button to open the spectator menu, then select an employee to watch.
The player names in the configuration join the allowlist along with the bots, and other players cannot connect. The server runs in offline mode and listens only on the local machine. You should not change the bind address or expose it externally.
Development and Diagnostic Commands
The project provides several commands for checking the environment and validating changes:
npm run doctor  # Read-only environment check
npm run check   # JavaScript syntax and JSON format checks
npm run smoke   # Demo-mode smoke test
npm run doctor returns exit code 0 when all items are ready, 2 when Minecraft is not ready, and 1 when the office cannot run. Add -- --json to output the results in JSON format.
During development, you can also use URL parameters, such as ?fast to speed up actions, ?idle=coffee to make idle employees perform a specified action, and ?cat=nap to adjust the cat's schedule. Refer to public/behavior.js for available action names.
Security Considerations
- The office reads Agent terminal output, which may contain code, paths, or sensitive information.
- The server only binds to
127.0.0.1and checks the Host header; do not expose the service through a reverse proxy, tunnel, or public network. - The office's only write operation is checking off bulletin board to-do items. All other Agent status and terminal data are read-only.
- The bookshelf only reads the configured folder and prevents path traversal and symlinks that escape the directory; you should still avoid storing passwords or tokens in the project folder.
- The Minecraft server only listens locally and has the whitelist enabled. Do not change it to accept external connections.
Conclusion
Agent Office 3D transforms Agent status that was previously scattered across terminals into an easy-to-understand 3D office. You can first use npm start to try the demo mode, then customize the company and employees through office.config.json, and finally connect to Herdr to view real Agent status. To add more interactivity, use npm run demo:minecraft to watch idle employees interact in a local Minecraft world.
Remember that this project is licensed under the MIT License and is not affiliated with Mojang or Microsoft; when using Minecraft, you must still read and accept its EULA yourself.