

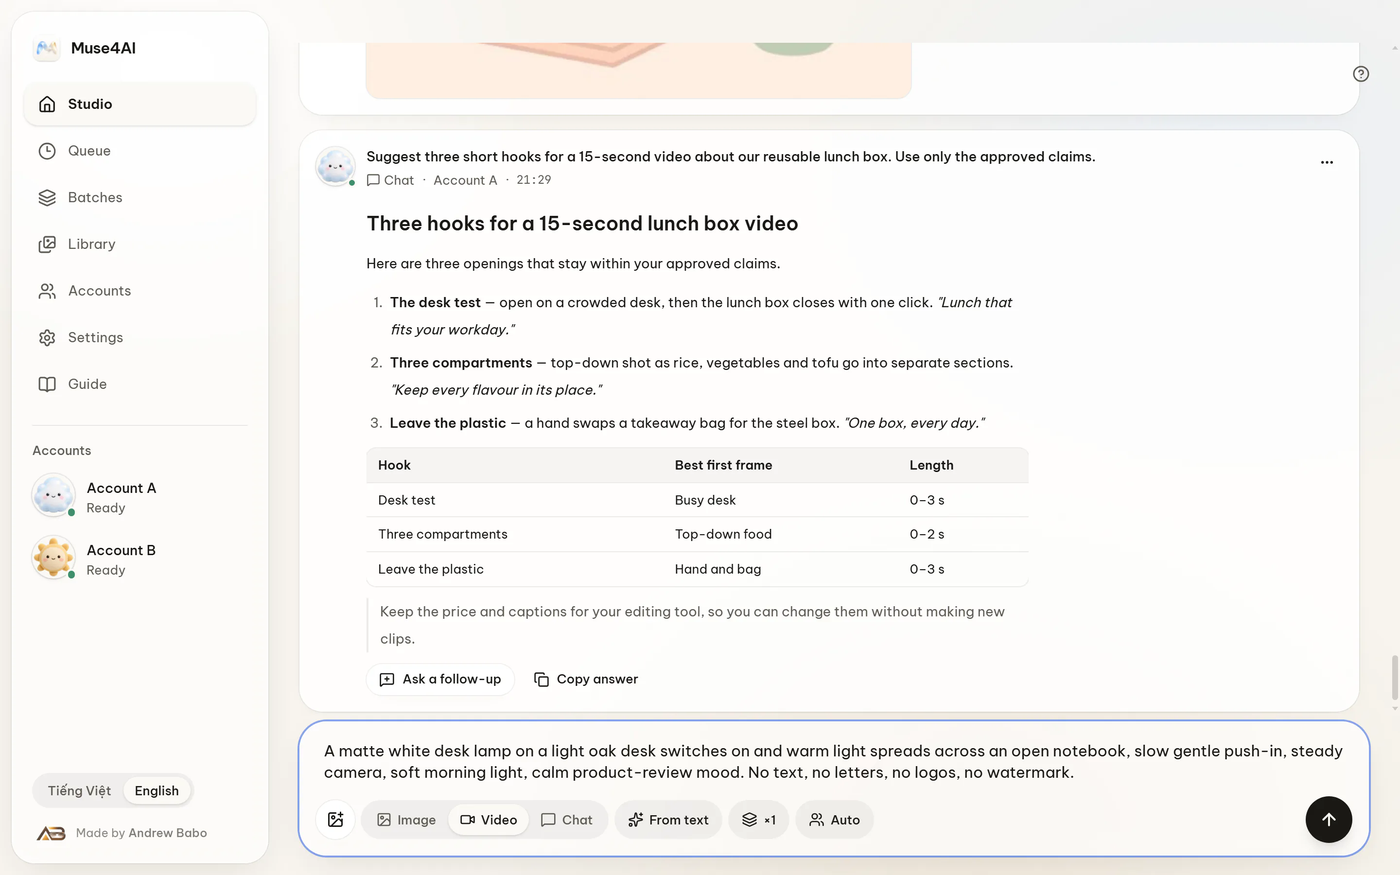
What is Muse4AI?
Muse4AI is a local Windows application that lets AI agents operate your signed-in Muse session. It connects tools such as ChatGPT, Claude, Cursor, Codex, n8n, and custom scripts to Muse through REST, MCP, or OAuth.
The application runs on your own PC and serves its local API at http://127.0.0.1:47821. Requests are not relayed through a Muse4AI cloud service. Your results, API keys, OAuth tokens, history, and local library remain under %APPDATA%\MuseStudio.
Key capabilities
- Generate images and videos: Submit text prompts, optionally include reference photos, choose an account, and monitor the work in the queue.
- Continue conversations: Chat jobs return a conversation ID so an agent can preserve context, iterate on an idea, and attach files.
- Extend completed videos: Continue a generated clip for as many as six steps and approximately 60 seconds per chain.
- Edit video with natural language: Attach an MP4 and describe the requested changes without configuring a traditional editing timeline.
- Use REST or MCP: Connect agent software through MCP tools or call the local REST API directly.
- Authorize securely: Use a scoped API key or complete an OAuth flow with a six-digit approval code.
- Manage work locally: Review queued jobs, previews, generated assets, connection settings, and searchable history in the desktop application.
Requirements and important limitations
The packaged application is intended for Windows 10 or Windows 11. If you run the project from source, you also need Node.js 22 or newer.
Muse4AI is an unofficial independent project and is not affiliated with, endorsed by, or sponsored by Meta Platforms, Inc. It automates your own Muse session, so review the applicable terms of service before relying on it. Changes to Muse may also affect the automation.
Packaged macOS and Linux versions are not currently tested or provided. Muse4AI has no cloud account, telemetry server, or subscription.
Install Muse4AI on Windows
Option 1: Use the installer
- Open the Muse4AI download page.
- Download and run the Windows installer.
- If Windows warns that the application is unsigned, select More info and then Run anyway.
- Open Muse4AI and go to Accounts.
- Add your Muse account and make sure its session is signed in.
Option 2: Run from source
Clone or download the repository, open a terminal in its root directory, and run:
cd desktop
npm install
npm run build
npm start
After startup, the desktop interface opens and the local API becomes available at http://127.0.0.1:47821.
Connect an AI agent with MCP and OAuth
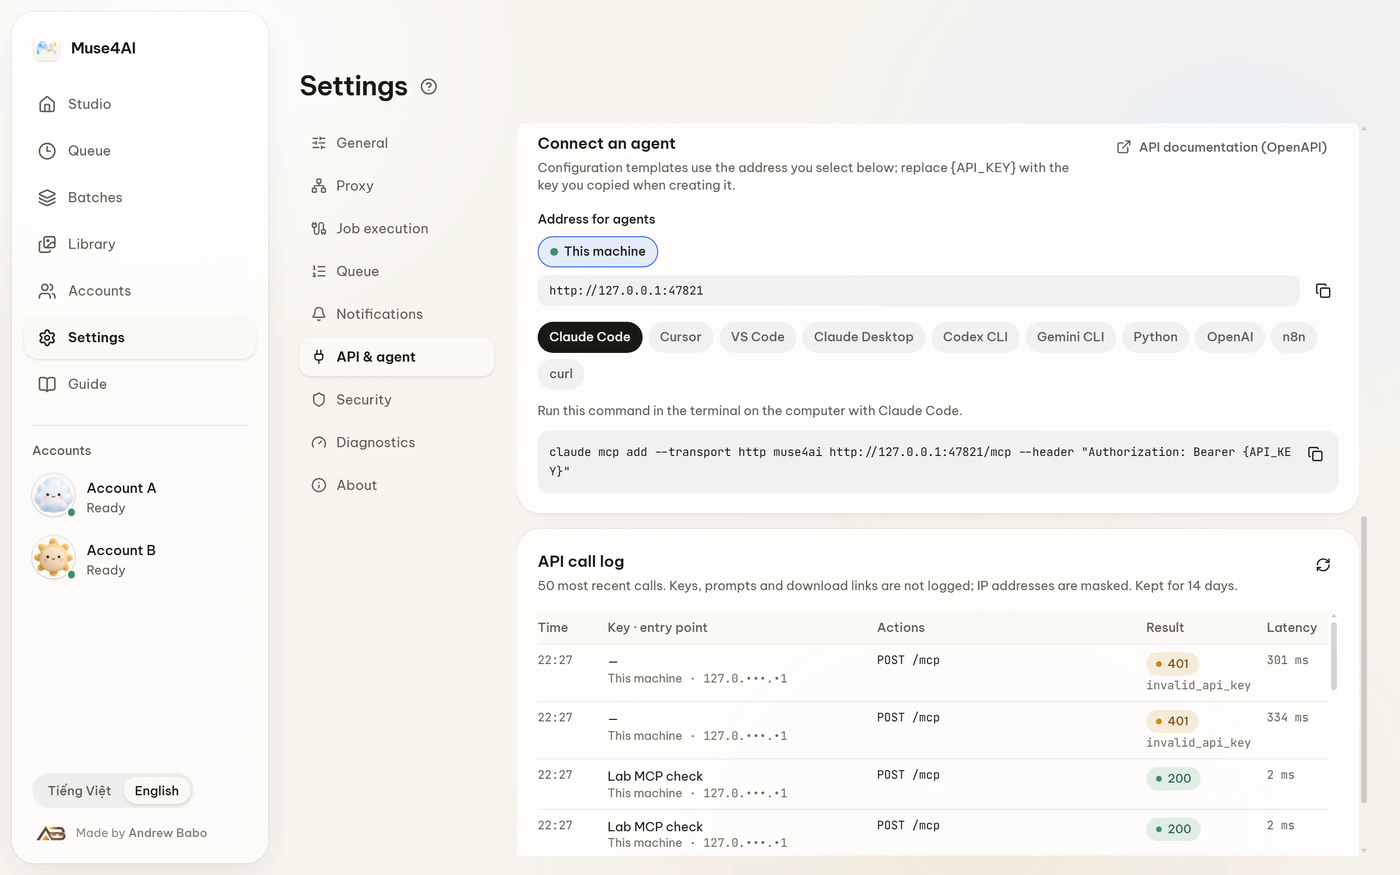
MCP is the most direct option for compatible agent clients. In Muse4AI, open Settings → API & agent. The application provides a ready-made connection snippet. A basic MCP configuration points the client to the local endpoint:
{
  "mcpServers": {
    "muse4ai": {
      "url": "http://127.0.0.1:47821/mcp"
    }
  }
}
Add this configuration to the MCP client used by your agent. During OAuth authorization, Muse4AI displays a six-digit code. Enter that code on the consent page to approve the connection and issue a token.
The OAuth server publishes its authorization metadata, supports dynamic client registration, and signs its own tokens. Knowing the local MCP URL is not enough to approve access because the user must also provide the code displayed by the desktop application.
To remove access later, open Settings → API & agent → Connected apps and revoke the relevant application.
Connect through the REST API
For scripts and services that use HTTP directly, create an API key from Settings → API & agent. Muse4AI keys begin with msk_. Send the key as a bearer token in the Authorization header.
Submit a video generation job
The following request creates a video job with a text prompt:
curl -X POST http://127.0.0.1:47821/v1/jobs \
  -H "Authorization: Bearer msk_YOUR_KEY" \
  -H "Content-Type: application/json" \
  -d '{"kind":"video","prompt":"a coffee cup on an oak desk, warm morning light"}'
Replace msk_YOUR_KEY with the key created by the desktop application. The submitted job appears in the in-app queue, where you can follow its status and inspect the result.
Available REST operations and MCP tools
POST /v1/jobscreates image or video jobs. The corresponding MCP tool ismuse_generate.POST /v1/jobswithkind: "chat"creates a chat job. The corresponding MCP tool ismuse_chat.GET /v1/jobslists jobs through REST. MCP clients can usemuse_list_jobs.GET /v1/jobs/{id}retrieves a particular job. The MCP equivalent ismuse_get_job.POST /v1/jobs/{id}/cancelcancels a job. The MCP tool ismuse_cancel_job.POST /v1/assets/{id}/extendandPOST /v1/conversations/{id}/extendsupport video extension. Related MCP tools includemuse_extend_videoandmuse_get_extend.GET /v1/statusandGET /v1/healthreport service information. MCP clients can usemuse_status.
The complete machine-readable API contract is available from the running application at GET /v1/openapi.json. Agents that work better with Markdown documentation can read llms.txt.
Basic agent workflows
Generate an image or video
- Confirm that Muse4AI is running and your Muse account is available under Accounts.
- Ask the connected agent to generate an image or video and provide a clear prompt.
- If needed, include reference photos and specify which configured account should be used.
- Open the queue to follow the job, view its status, and preview the result.
- Find completed work in the local library.
Continue a chat
Use muse_chat or create a REST job with kind: "chat". Keep the returned conversation ID so the agent can continue the same thread rather than starting a separate conversation.
Extend a completed clip
After a video finishes, use the asset or conversation extension endpoint, or ask an MCP agent to call muse_extend_video. Extensions stay in the conversation where the original clip was created. A chain can contain up to six extension steps and reach approximately 60 seconds.
Edit an existing video
Attach an MP4 and describe the requested change in plain language. Muse4AI passes the request through your Muse session without requiring timeline or rendering settings.
Advanced tips
Use the right authorization method
Choose OAuth when your MCP client supports interactive authorization and you do not want to copy a key. Choose an API key for command-line tools, local automation, and systems that send bearer tokens. API keys are scoped, rate-limited, and individually revocable.
Protect local credentials
Do not publish an msk_ key in source control, screenshots, shared prompts, or shell history. Create separate keys for separate clients when practical, then revoke only the affected key if access is no longer required.
Preserve conversation IDs
When building an integration, store the conversation ID returned by chat and generation workflows. Reusing it allows the agent to continue a thread, attach files in context, and extend a video in its original conversation.
Inspect the API contract
Instead of guessing request and response fields, read http://127.0.0.1:47821/v1/openapi.json from the running application. This is especially useful when generating a typed client or configuring an automation platform.
Monitor status before submitting work
Use GET /v1/status, GET /v1/health, or the muse_status MCP tool to check the local service before starting a longer workflow. Use the list and get operations to monitor jobs, and cancel work that is no longer needed.
Develop and test the project
The repository separates the desktop application, shared content, and agent instructions:
desktop/contains the main process, renderer, REST, MCP and OAuth APIs, tests, and installer code.content/contains guide, agent, and use-case text shared by the application and website.agent-kit/contains the Muse4AI Skill that agents can read to learn how to use the tool.
From the desktop directory, run the project checks and Windows packaging command:
cd desktop
npm test
npm run typecheck
npm run package:win
The test command runs the repository's test suite, npm run typecheck checks strict TypeScript, and npm run package:win prepares the Windows ZIP and installer inputs.
Conclusion
Muse4AI provides a local bridge between Muse and AI agents that understand REST, MCP, or OAuth. Once the Windows application is running and your Muse account is connected, you can generate media, maintain conversations, extend videos, edit MP4 files through natural-language requests, and manage results without a Muse4AI cloud intermediary.
For additional screenshots and guidance, visit the official guide. Muse4AI is available under the MIT license.