

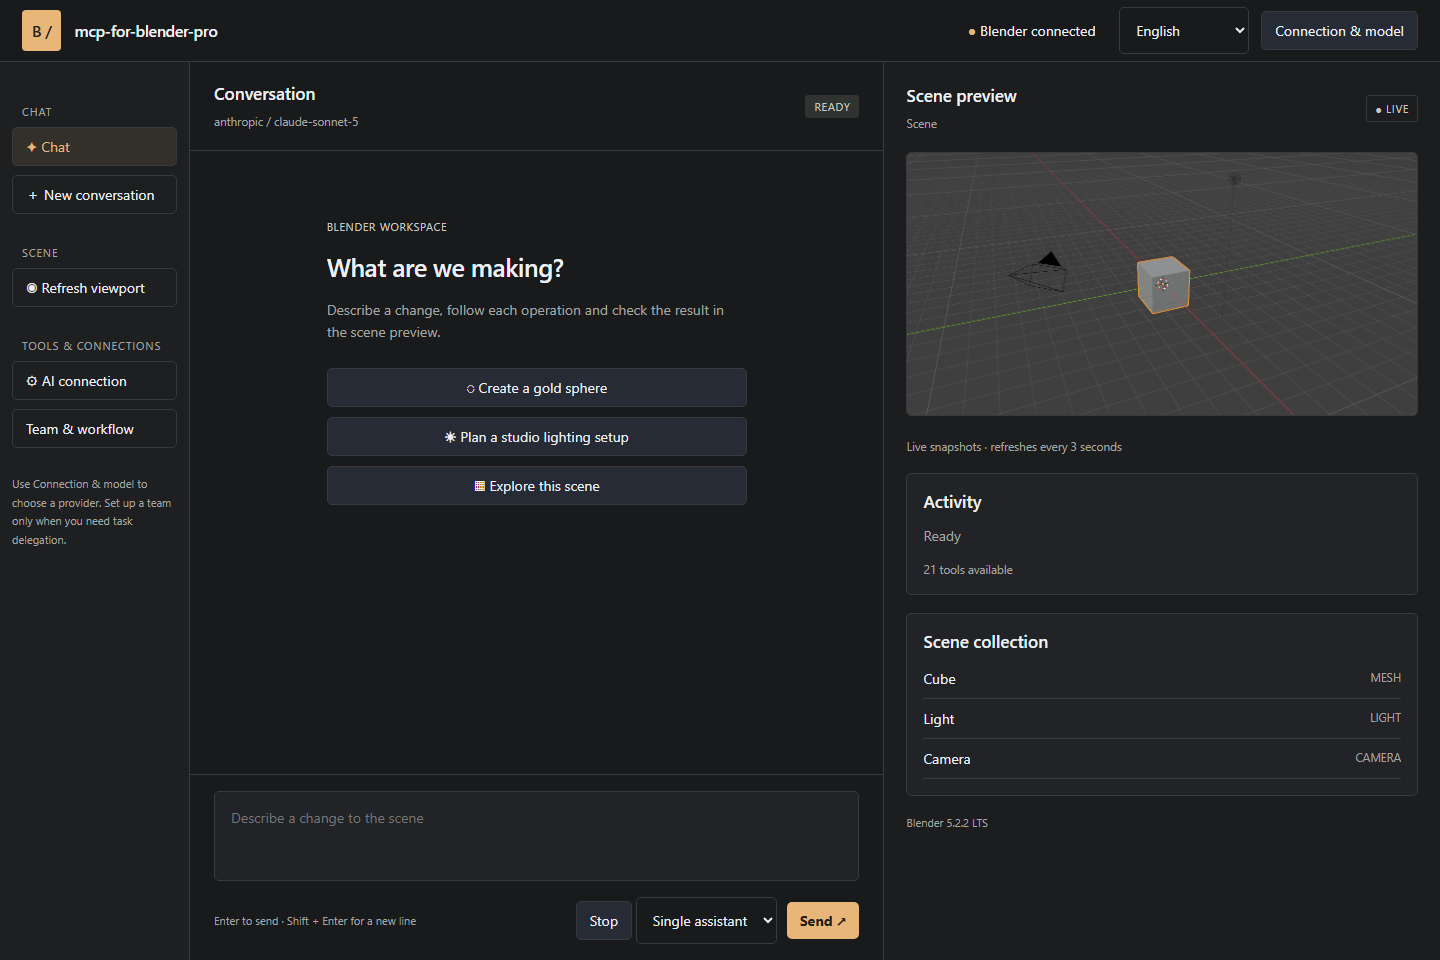
mcp-for-blender-pro connects Blender with AI assistants, model providers, and Model Context Protocol (MCP) clients in one creative workspace. It can inspect scenes, create and edit objects, assign materials, search assets, capture viewport previews, consult Blender APIs, and export scenes.
This tutorial explains how to install the extension, configure an AI connection, send useful prompts, and extend your workflow with agent teams or external MCP clients.
What mcp-for-blender-pro does
The project adds an AI assistant to Blender and provides a companion visual Studio workspace. You can describe a creative or technical task in natural language while the assistant uses Blender-aware tools to inspect the current scene and perform approved operations.
The extension is designed for artists who want faster iteration, technical artists automating repetitive work, and developers connecting AI tools to Blender through MCP.
Key features
- Scene-aware assistance: inspect scenes and objects before making changes.
- Visual Studio workspace: combine chat, scene objects, viewport snapshots, approvals, and a task board.
- Multiple AI connections: use OpenAI, Anthropic Claude, Google Gemini, OpenRouter, OpenCode Zen, Ollama, or compatible custom APIs.
- Saved connections: keep work and personal configurations separate and store multiple keys for the same provider.
- Agent workflows: use a single assistant or configure managers, workers, and reviewers for larger tasks.
- Built-in MCP server: connect OpenCode and other clients that support authenticated Streamable HTTP MCP.
- Scene tools: create, inspect, edit, capture, search assets, consult Blender APIs, and export scenes.
- Multilingual interface: choose English, German, French, Spanish, or Chinese for the main interface.
Prerequisites and installation
The release bundle targets Windows x64 and requires Blender 4.2 or later. Download the latest mcp-for-blender-pro release before starting.
- Download
mcp-for-blender-pro.zipfrom the Releases page. - Open Blender and go to Edit → Preferences → Get Extensions.
- Open the extensions menu and choose Install from Disk.
- Select the downloaded ZIP file.
- Enable
mcp-for-blender-pro. - In the 3D Viewport, press
Nto open the sidebar and select MCP Pro.
Keep Blender open while using the Studio window or an external MCP client. The add-on runs locally and authenticates requests to Blender.
Configure a model connection
After enabling the extension, use the MCP Pro panel to choose a provider, enter the required connection details, and select a model. You can load the available model catalog and choose a model directly in Blender or Studio.
Supported custom endpoints can use the OpenAI Chat Completions, Anthropic Messages, or Ollama protocols. Select a model with tool-calling support. Image-capable models can also interpret viewport screenshots.
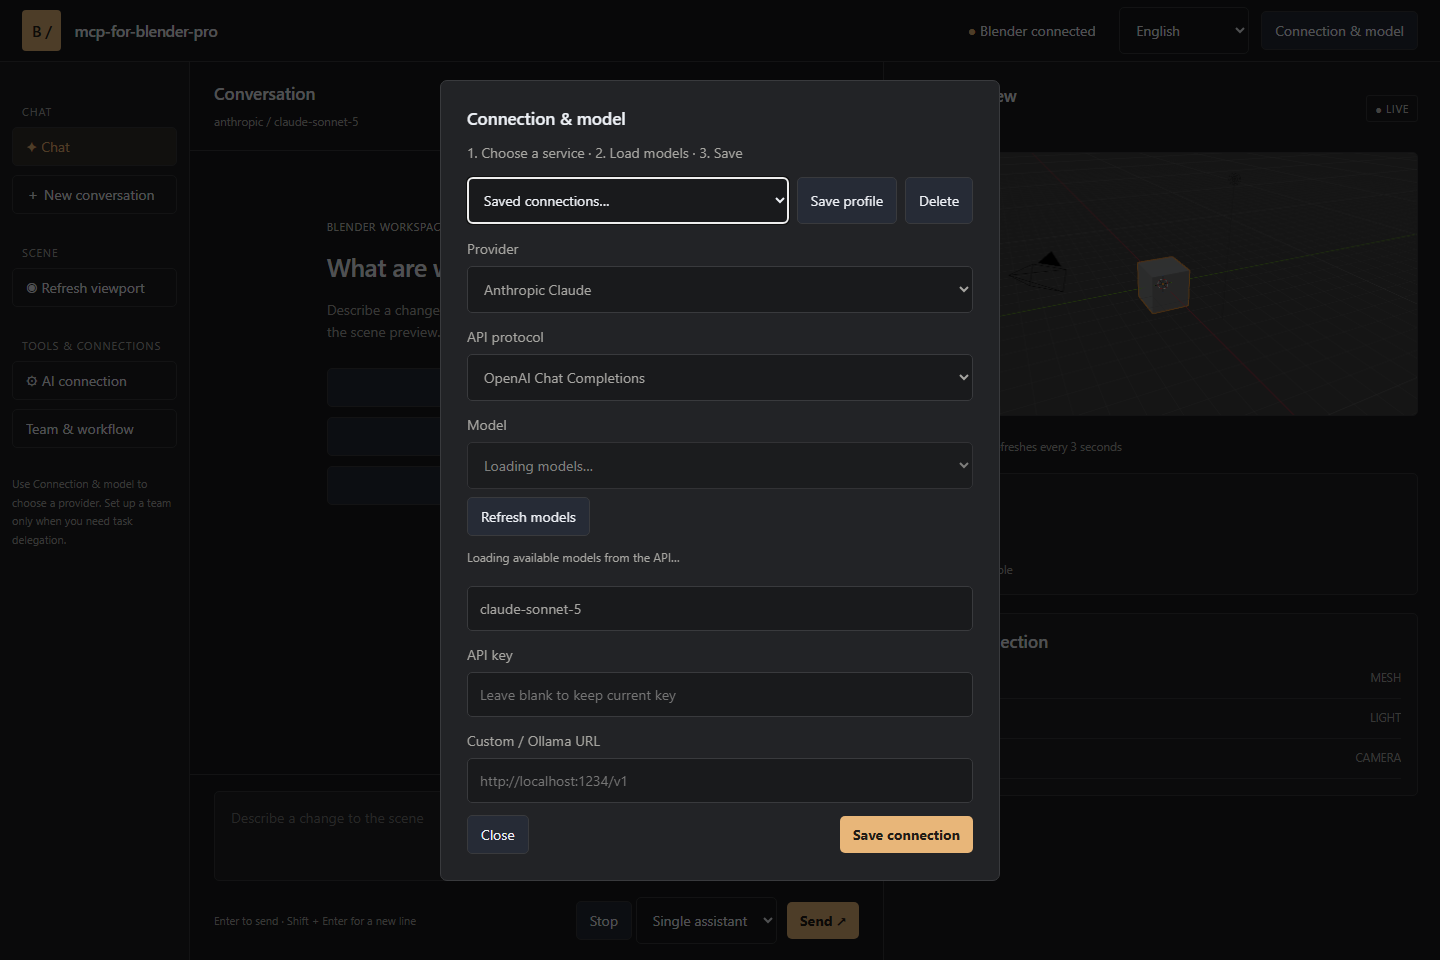
For local inference, connect an Ollama model. For hosted services, configure one of the supported cloud providers. OpenCode-only free models are available through the OpenCode client.
Connection credentials are stored in your user settings. Chat history lasts for the current session, so save any important instructions or results elsewhere if you need a long-term record.
Use the assistant for basic Blender tasks
Send a message in Blender after selecting a connection and model, or click Open Studio Window to work in the visual workspace. Start with an inspection request so the assistant can understand the current scene before modifying it.
Inspect this scene and explain its object structure before making any changes.
Once you understand the scene, ask the assistant to create a small composition. For example:
Create a simple product-display scene with a pedestal, a camera and three lights. Give the pedestal a matte blue material.
You can also request repetitive object operations and visual feedback:
Duplicate the selected object into a neatly spaced row of five and show the viewport.
When working with external assets, ask the assistant to identify a suitable asset and request approval before importing it:
Find an appropriate Poly Haven asset for this scene and ask before importing it.
Reviewing and controlling changes
Built-in chat supports operation approvals, cancellation after the current step, and named undo steps for mutations. Review proposed operations and inspect the viewport before accepting changes, particularly when a request affects multiple objects or materials.
Python tool validation can help catch disallowed operations, but it is not a security sandbox. External MCP clients manage their own approval policies.
Understand the available scene tools
mcp-for-blender-pro exposes 21 scene tools grouped by purpose. The assistant can select these tools as it works through a request.
- Scene inspection:
get_scene_info,list_objects, andget_object_info. - Object creation:
add_cube,add_sphere,add_cylinder,add_plane,add_light, andadd_camera. - Editing:
move_object,duplicate_object,delete_object,parent_objects, andset_material. - Visual feedback and scripting:
viewport_screenshotandexecute_code. - Blender API and export:
bpy_api_lookup,describe_node_type, andexport_scene. - Asset workflows:
search_assetsandimport_asset.
These tools let you combine inspection, scene editing, visual verification, scripting, asset discovery, and export in a single conversation.
Build a multi-agent workflow
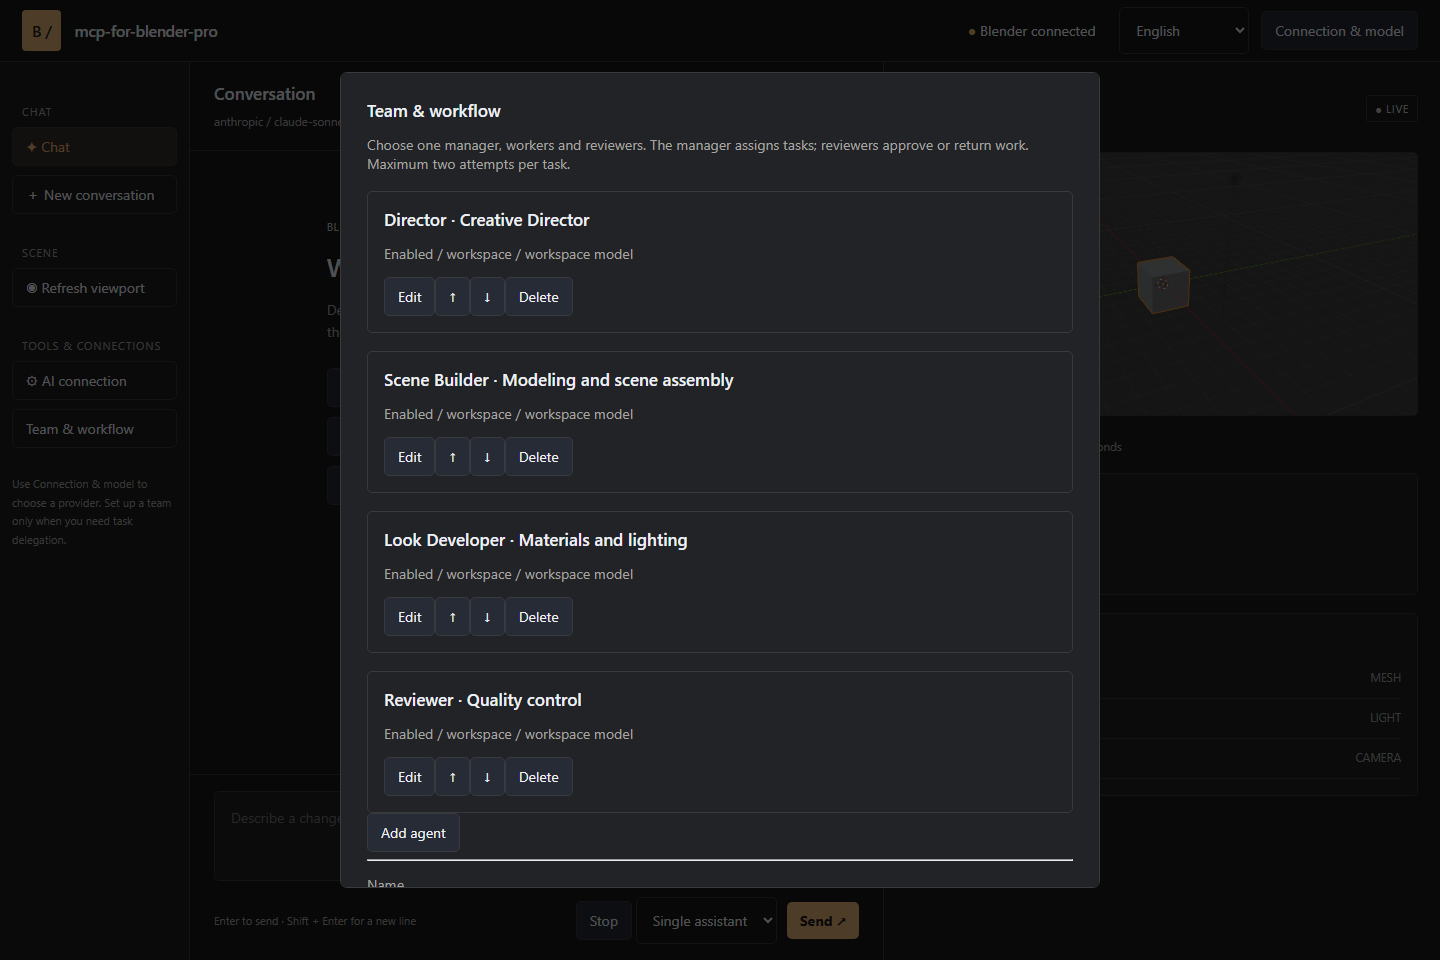
Use Single assistant for direct conversational changes. For larger projects, configure a Team chain with separate responsibilities, instructions, and models.
- Manager: breaks the request into assignments and acceptance criteria.
- Workers: perform the assigned scene operations.
- Reviewers: inspect results and approve the work or return specific findings.
Tasks run sequentially so scene edits remain ordered. A blocked task receives one correction attempt. If the second review also fails, the workflow stops. The task board shows assignments, attempts, and review findings as the work progresses.
Connect external MCP clients
The built-in MCP server supports OpenCode and other compatible clients using authenticated Streamable HTTP MCP. You can launch OpenCode Portable from the sidebar; OpenCode manages its own provider sign-in and model selection.
For other MCP clients, follow the project's connection guide and use the authenticated local endpoint described there. Keep Blender running while the external client is connected.
Use asset integrations responsibly
Asset workflows include integrations with Poly Haven, Sketchfab, and Poly Pizza. Configure service keys where required, and review the license for every asset you search for or import.
A useful workflow is to ask the assistant to search first, describe the available options, and request approval before importing the selected asset into the scene.
Advanced usage tips
- Inspect before editing: ask for scene and object information before issuing a complex mutation.
- Break down large briefs: use a manager, workers, and reviewers when a task contains several dependent operations.
- Request viewport feedback: ask the assistant to capture or show the viewport after important changes.
- Choose tool-capable models: custom and hosted models should support tool calling for scene operations.
- Use image-capable models when needed: these models can interpret viewport screenshots.
- Separate connections: use saved work and personal connections to keep credentials and model choices organized.
- Review approvals: use operation approvals, cancellation, and named undo steps to maintain control of scene mutations.
- Check asset licenses: confirm usage rights before including external assets in a final project.
Conclusion
mcp-for-blender-pro brings AI chat, Blender scene tools, model connections, visual feedback, and MCP automation into one workflow. Install the extension on Blender 4.2 or later, configure a supported provider or local Ollama model, and begin with inspection prompts before moving to object creation, materials, assets, and exports. For more complex production tasks, use the Studio task board and agent roles to organize sequential work and review.
For setup details, consult the project's quickstart guide and GitHub repository.